• Increase or decrease width on a pattern, part 1 – trousers

    I wanted to gather all the adjustments you can do for a trousers in one post, buut, I figured it would be such a long post and that it would take forever to write. Therefore, I will divide it into several posts and instead work on categorizing the adjustments to make it easier to find them here on the blog (will get back to you when my website is better structured and easier to search in …)

    Anyway. I’ll start by showing how you can increase or decrease the width on your pattern.

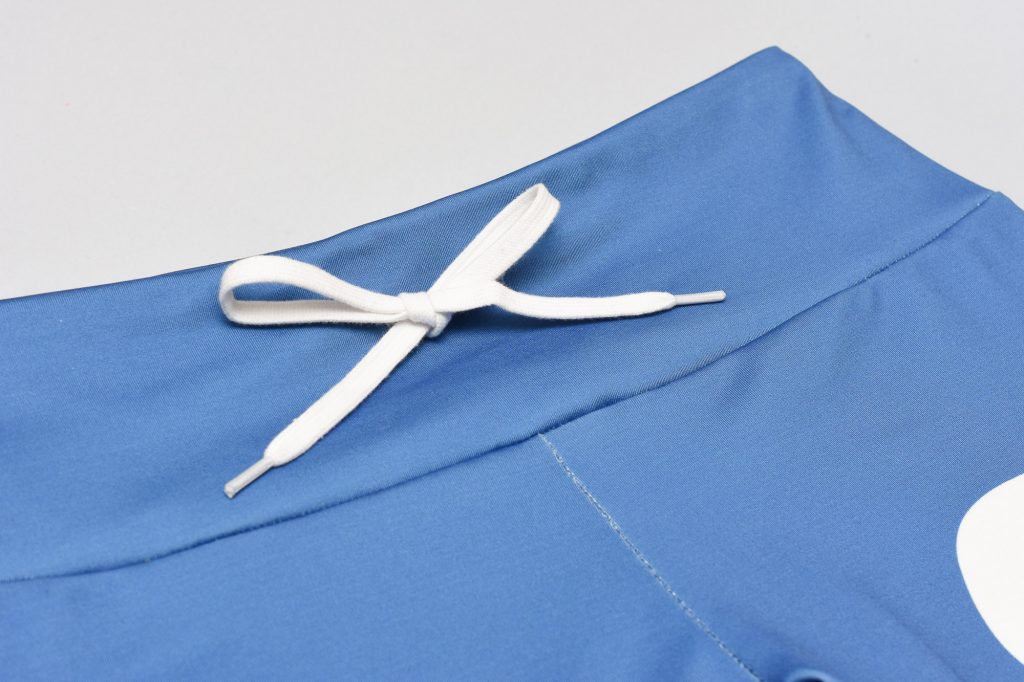
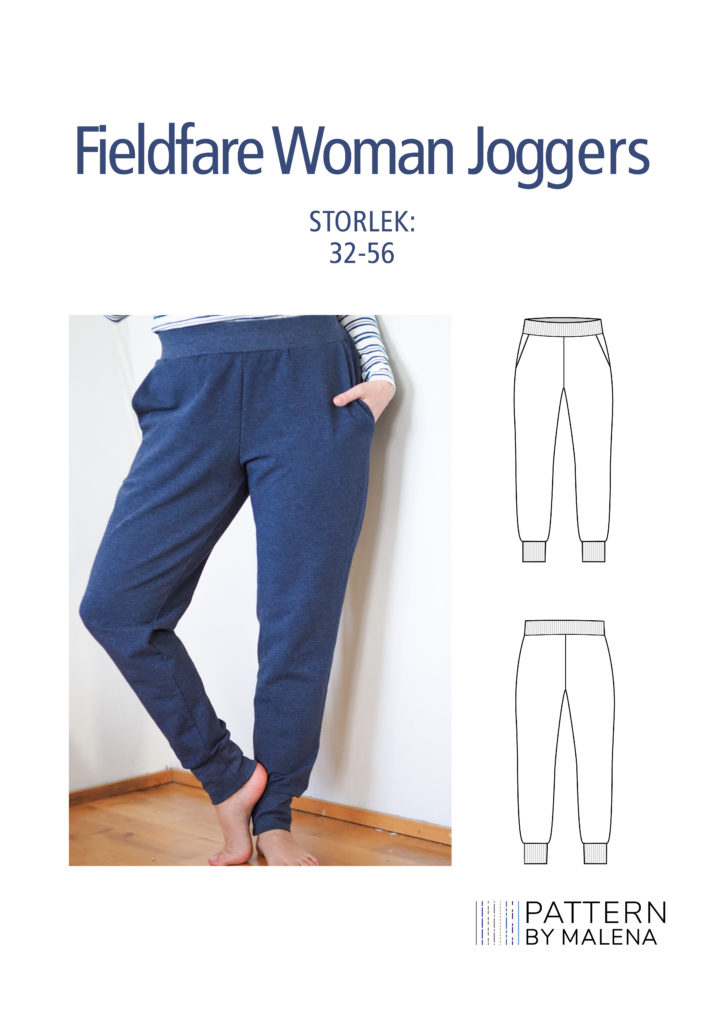
    Below is a picture of my Fieldfare joggers for women, but of course you can apply the same adjustments to other patterns. Before making any adjustments, I recommend you to check the stretch of your fabric! If it’s a stiffer fabric than recommended, it might be better to even go up a size. But if it is a very stretchy fabric you may not need to increase so much.
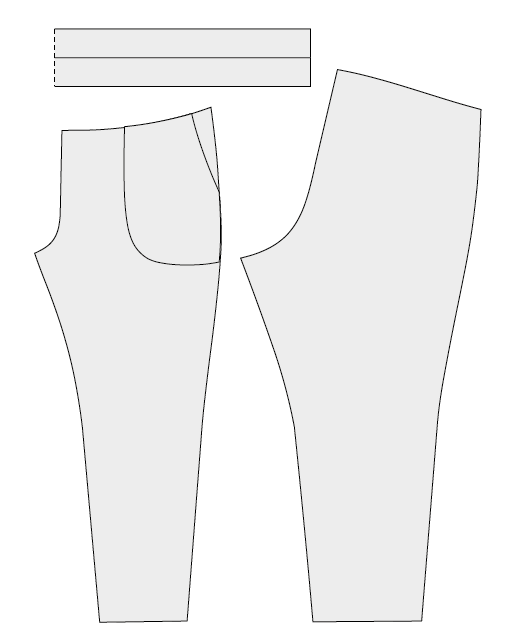
    Fieldfare joggers for women without any adjustments

    Increase the waist:

    If your waist measurement is 6cm larger than the body measurement list, you can increase the waistline by 6cm in total. Distribute half that width, ie 3cm on front side, back side and back rise and also increase the waistband by 3cm. Also adjust the pockets. You only increase half the width because all the pattern pieces are cut twice, and then you increase the total with 6cm.

    How you distribute the width varies on your body silhouette. If you are straighter in the waist on the sides, you may only want to add the width to the sides and nothing at the back rise. Would you rather increase the width at the tummy, I recommend a “full tummy adjustment” which I will write about in a later post.
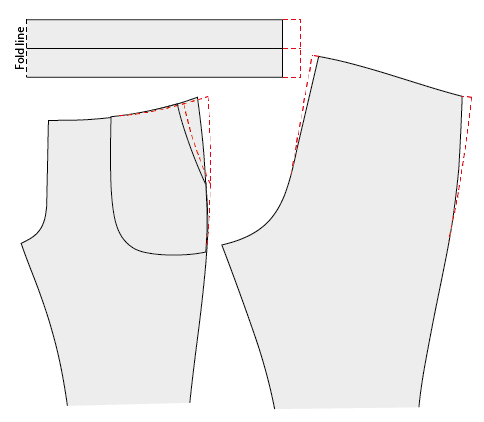
    Decrease the waist:

    The same applies if you want to reduce the waist by a total of 6cm. Divide it in half and reduce the width in the sides and the back rise, or solely in the sides depending on your body silhouette. Remember to reduce the waistband as well. Also adjust an inner and outer pocket patterns.
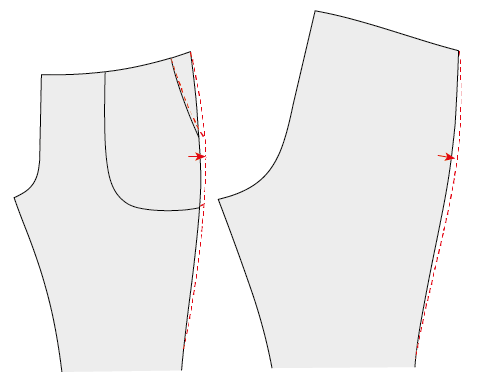
    Increase the width of the hips:

    If you want to increase the width of the hips on the pattern, draw a new softly rounded line and widen the desired width on the hip. Look at the pattern where the hip is at its widest and increase the most there. Also adjust the pockets. To calculate how much you want to increase, compare your measurements with the body measurement list and then distribute it on the pattern. So, for example, if you want to increase a total of 4cm, increase 1cm on the side. (Front piece increased 1cm x2 + Back piece increased 1cm = 4cm increased total width).

    Look at your silhouette and see where it is you want to increase the width. This adjustment is suitable if you only want to widen the hips on the side. But if you would rather increase the width for a fuller seat at back, I recommend only increasing the width at the back patter piece, which I will show in a later post.
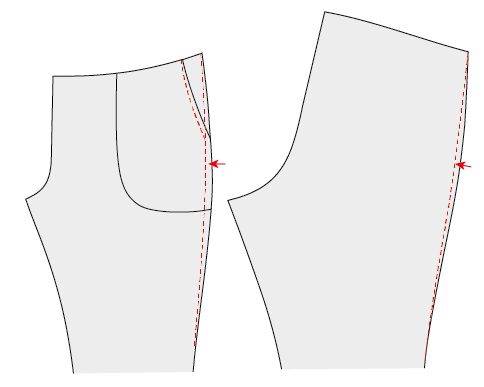
    Decrease the width of the hips:

    If you have straight hips and there is extra width on the sides, you can make the sides straighter. If you want to reduce the hips by a total of 4cm, you reduce 1cm on both the front and back hips. Also adjust the pockets.
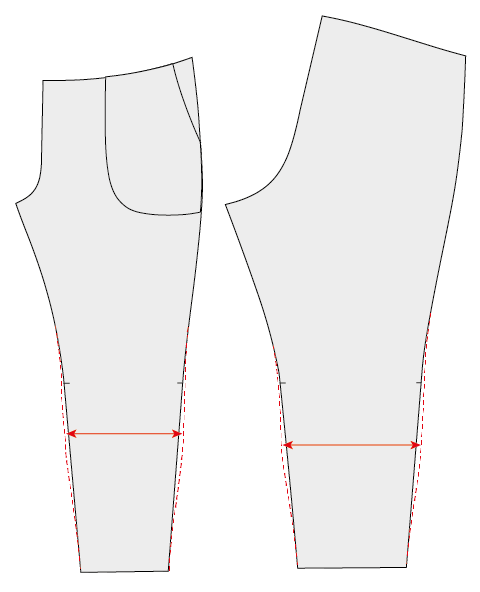
    Increase the width of the calf:

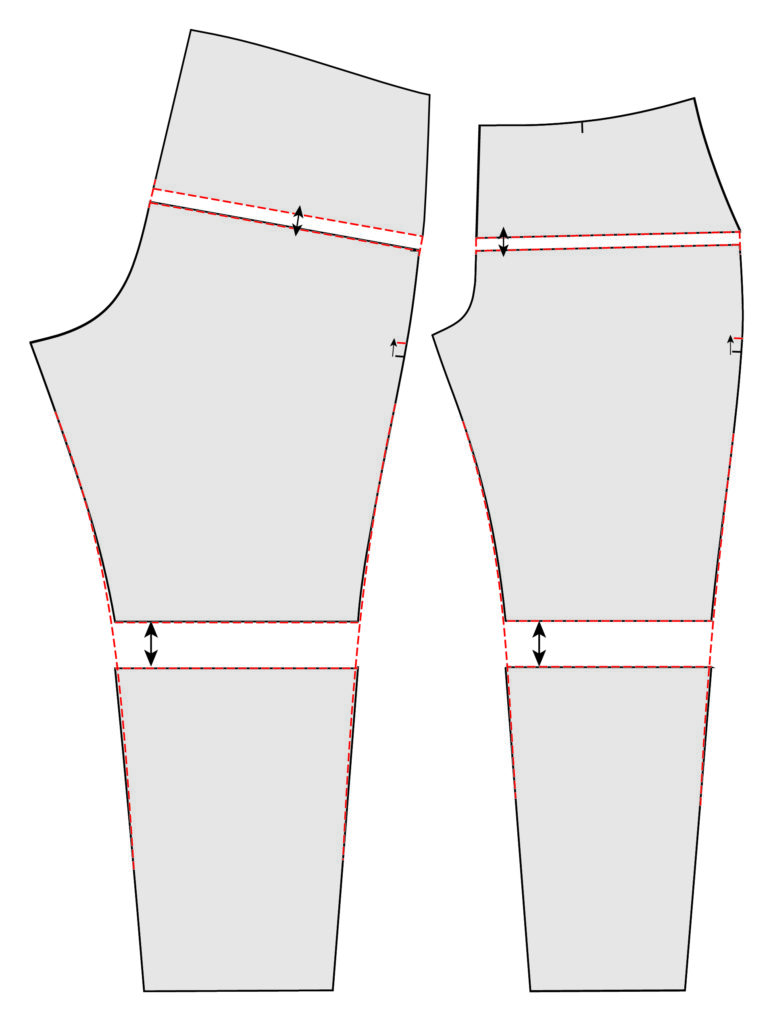
    If you want to increase the calf width by a total of 4cm, divide it with 4, and you then increase each side by 1cm. About halfway or 1/3 between the knee and the bottom edge, you can add the width and then redraw the sidelines to a soft line.

    In this example I have not increased anything on the bottom width, but you can of course add width there as well to get a wider leg.
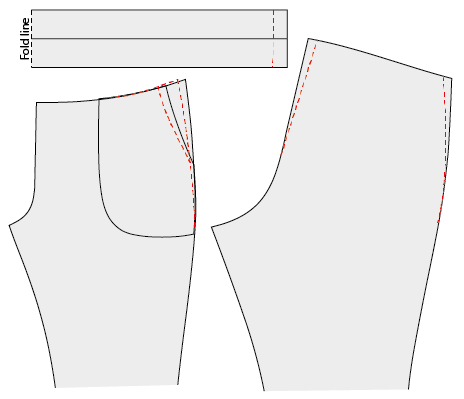
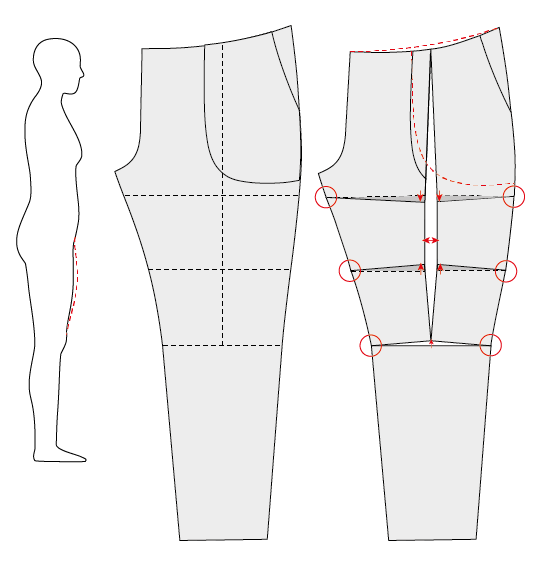
    Increase the width of the front thigh:

    If you have wider thighs in the front, it is better to only increase the width of the front piece. Cut the pattern like the dotted lines. You want to keep the length of the outer and inner side seams since they will be sewn together to the back piece. Increase the width in the middle of the thigh and draw out new smooth side seams. The waist shape at the top can be kept same as before (a bit of the height is reduced in the middle as you twist the pattern pieces).

    Doing this pattern adjustment is good if you want to increase the front thigh width quite a lot. But if you only want to increase it with 1-2cm you can make it easier and just “straighten” both the inner and outer side seams between the crotch and the knee.
    I hope this was helpful! In the next post I will show adjustments for a full / flat seat and full tummy adjustment.

    But it’s not always easy to know how or where to add or remove the width. Start by carefully measure your measurements (and measure often!) and compare them with the body measurement list or size chart. Different companies will probably have different size charts, so it’s good to doublecheck this since it may vary. But it’s also important to know where on your body the measurements differ. Look at your body in a mirror (without being judgmental or self-critical, now it is the pattern and clothes that will be adjusted to your body!!) and simply get to know your body’s silhouette. Your posture has a great impact for how the width is distributed and that is not shown only by measuring your body. I’m the same size when measureing my waist and hip, but since I’ve a bit of a “collapsed” posture and a sway back, the waistband on jeans are usually gaping at the back on my body and the waist feels too tight at my tummy. So even if the the waist size is good for my body, the width needs to be increased at the front and reduced at the back. And yes, this adjustment will also be in a future post!

    You can find my Fieldfare joggers at my Etsy shop!

  • Sewing a drawstring on your joggers

    Since I work as a pattern maker, I will focus on writing posts about how you can adjust your patterns. However, I still want to share tips on how you can vary the sewing on my designs. So, I thought I’d get some help from Johanna who writes the blog The Last Stitch. She has written a very clear and detailed post on how to add a drawstring to her Aila leggings. The same technique can of course be used for my joggers.

    You can find her post here!

    Picture from The Last Stitch

  • How to lengthen or shorten a pattern for pants – woman

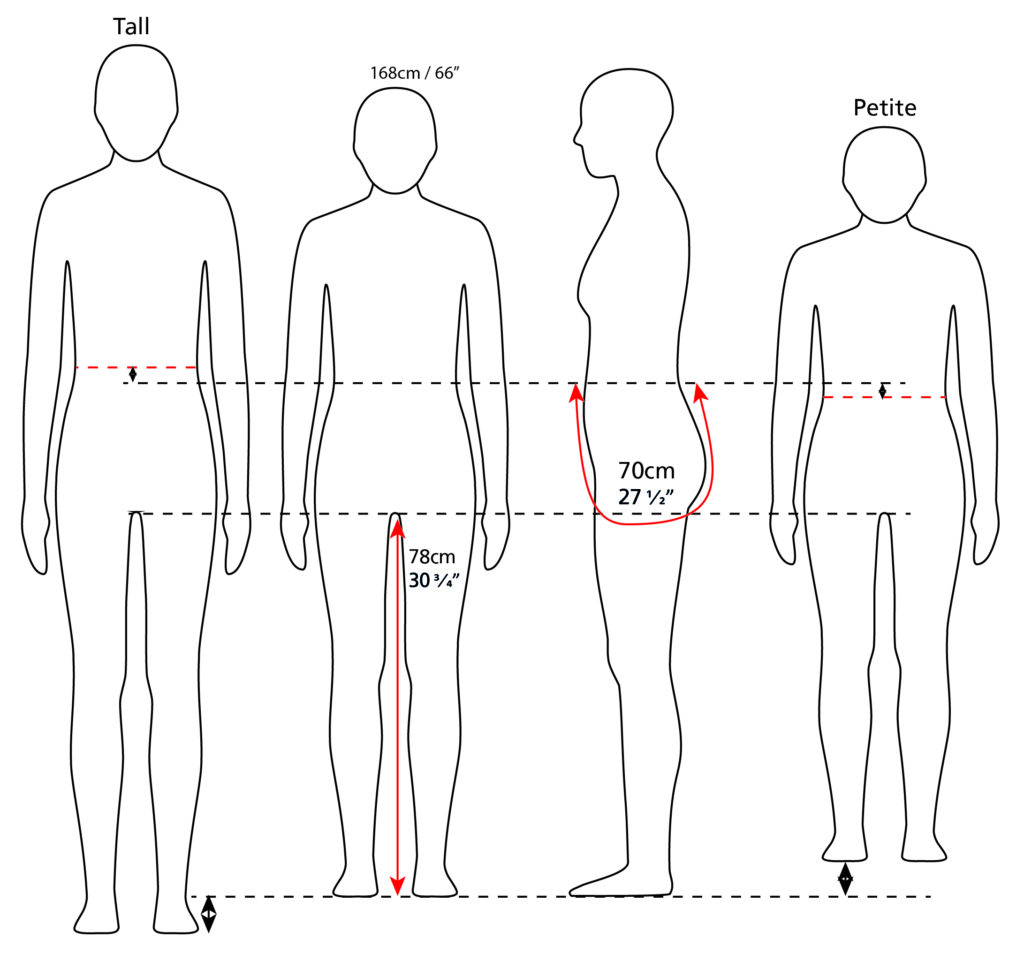
    A common pattern adjustment is to lengthen or shorten a trouser. I have made a guide for how to lengthen / shorten your pattern and how much to adjust. My Fieldfare jogger’s pattern is made for a person who is about 168cm tall (66”), but the body proportions can of course vary even if you are that length. Therefore, it can also be good to measure the inner leg length and the total front and back rise and compare with the measurement list below.

    Inner leg length is measured from the crotch down to the floor. The easiest way to measure the total rise length is to tie an elastic around the waist at the narrowest point and measure the rise length from the front waist to the back. Then compare with the measurement list above and see if it is mainly the rise height or leg length that needs to be adjusted on the pattern.

    How much do you need to adjust the pattern then? If you have 5cm (2”) shorter / longer inner leg length compared to the measurement chart, then you can shorten / extend the legs by 5cm (2”). If your total rise length is 3cm (1,2”) shorter / longer compared to the chart, then shorten / longer it with 3cm (1,2”) in total, that means 1.5cm (0,6”) on the front piece and 1.5cm (0,6”) on the back piece. However, the overall front and back rise length is a bit trickier to adjust since that length may depend on posture or even distribution of body width. But at least this can give an indication of how big the adjustment should be.

    Then, of course, your preference and taste also matter. How high do you want the waist to be? How long do you want the legs? In the sewing description there is a measurement chart for the finished garment. If you have a favourite garment, you can compare those measurements with your garment and get an indication of what needs to be adjusted.

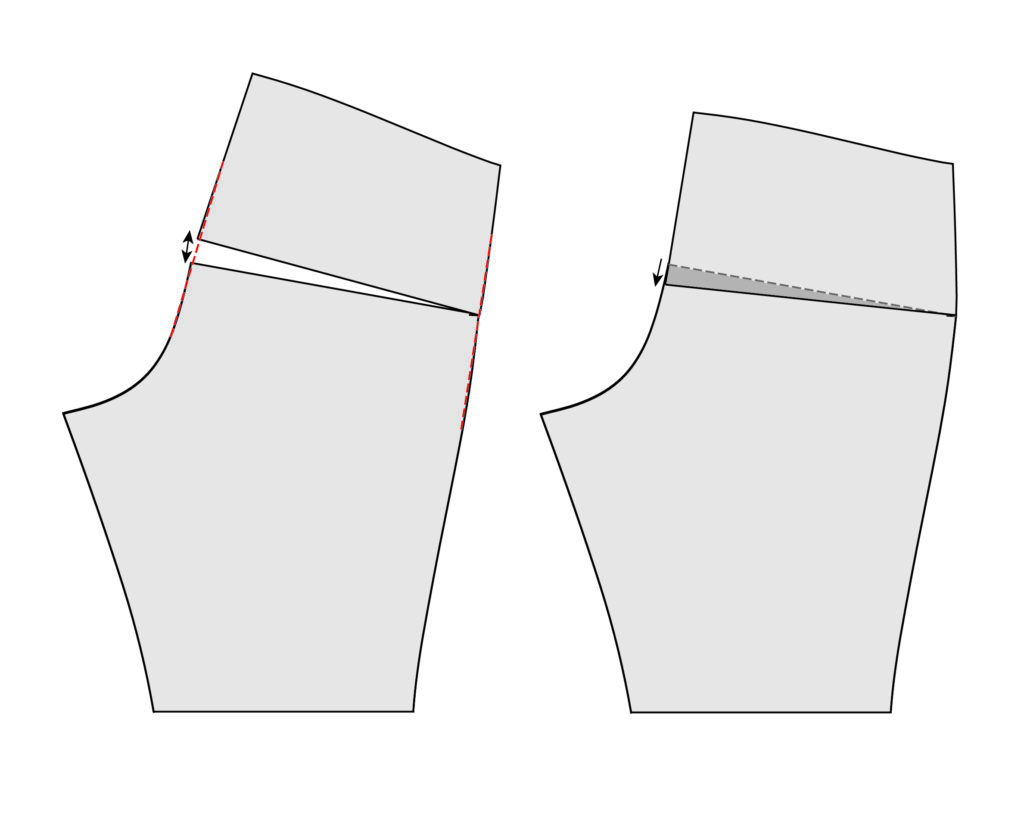
    The simple and fast way: If it’s only a few cm you want to adjust the pattern, you can do it the easy way and just increase / decrease the seam allowance by 1cm (3/8”) at the leg or waist, depending on where you want to extend the pattern. But if you need to make a bigger adjustment, it is better to do it the “proper” way and distribute the length more evenly so that the width is also placed right.

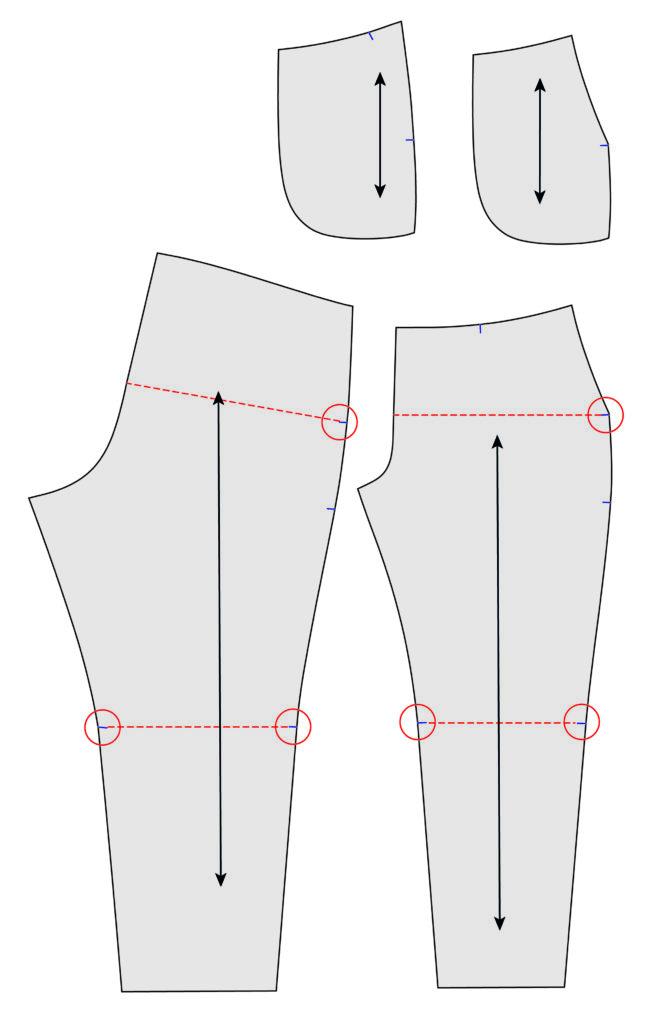
    On my pattern there are no lines drawn for where to extend / shorten the pattern, but you can use the notches to help. The notches on the leg shows the position of the knee and you can draw your line there. For the front and back rise, you can draw the line at the pocket opening notch.

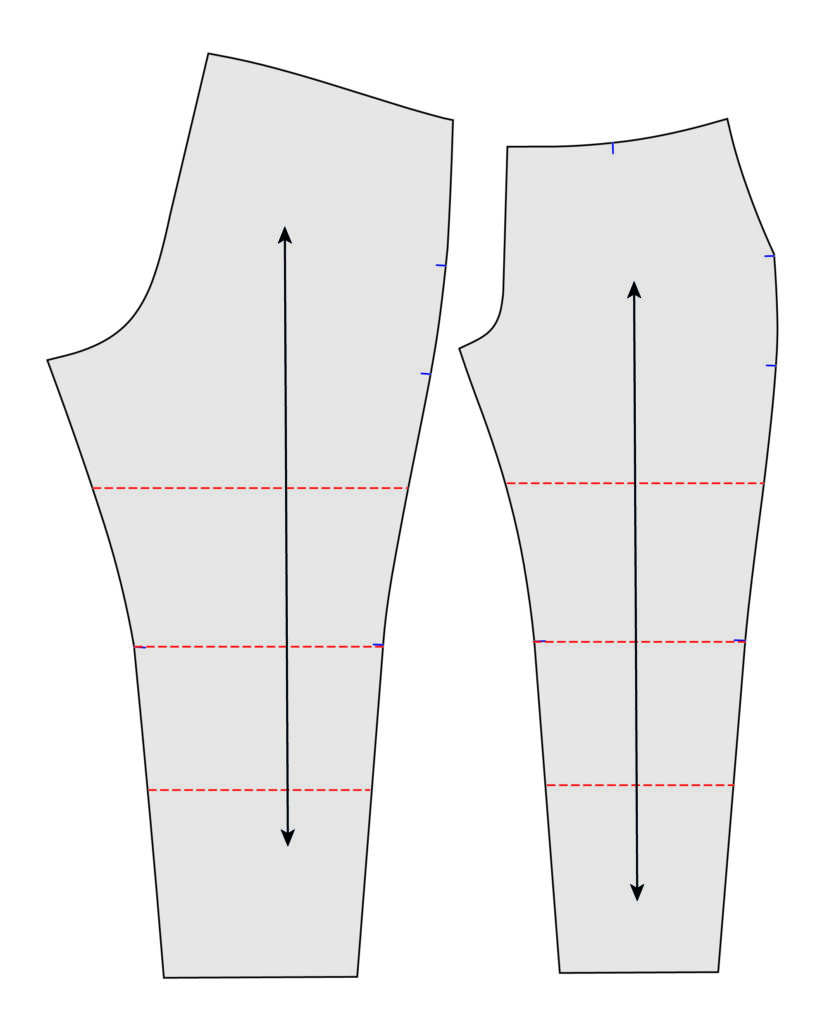
    So why didn’t I draw these lines on the pattern? Well, mostly because there is no exact rule for where this line should be placed, and it also depends on what part you want to extend. If you want to extend the legs very much, it is also better to do it in more places to get the length more evenly distributed. And maybe you want to extend the upper leg more than the lower leg? It all depends on how your body looks. Below are examples of if you want to distribute the length in 3 different places, at the knee, the middle of the thigh and the middle of the calf.

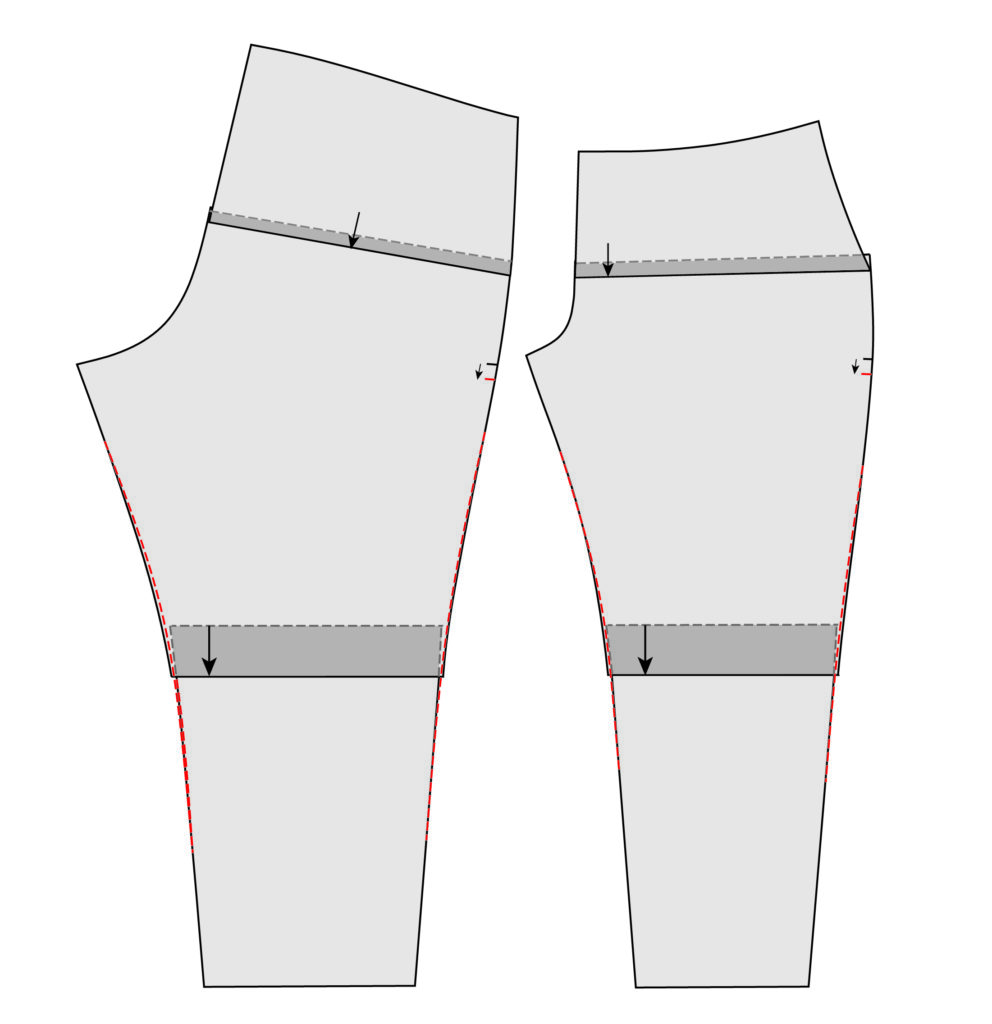
    If you want to extend the front and back raise totally 3cm (1,2”) and the legs 5cm (2”), start by cutting the pattern on the dashed line at the knee and at the seat. Then move up the waist part 1.5cm (0,6”) on both the front and the back piece, be careful to move equally everywhere and remember to also move up the notches for the bottom position of the pocket. To extend the leg, increase the distance at the knee by 5cm (2“). You can have a pattern paper underneath your cutted pattern and then glue (or us scotch tape) the new placement on the pattern paper. Draw new and smoother side and front/back rise lines.

    The same principle applies if you want to shorten the rise by a total of 3cm (1,2”) and the leg with 5cm (2”). You cut the dashed line at the knee and the seat and overlap the pattern pieces and tape or glue the new placement. Make sure that it becomes 1.5cm (0,6”) evenly over the seat and 5cm (2”) evenly at the knee. Remember to also move down the notches for the bottom position of the pocket.

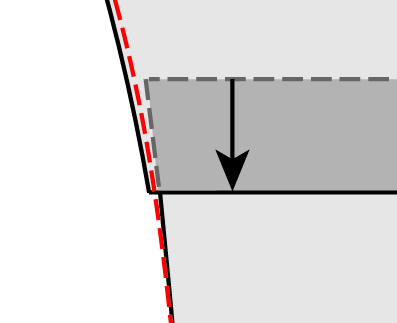
    Draw a new and smoother line at the side seam and front and back rise.

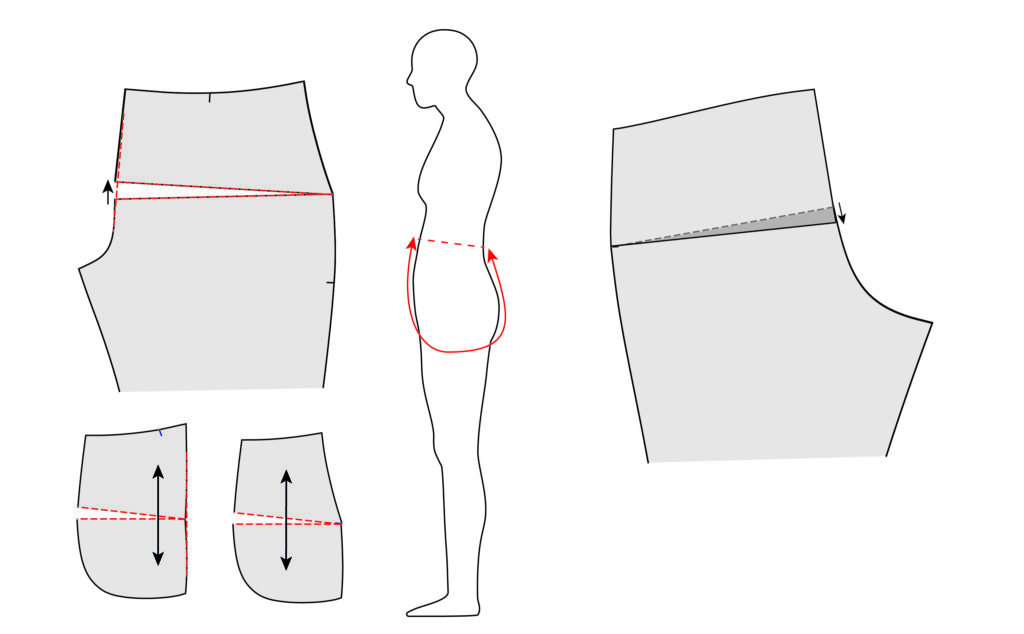
    In the above example, the pattern parts are extended equally much. But sometimes you just want to extend or shorten the front / back rise. Then you can cut the pattern at the same dashed line at the seat and increase / decrease only at the front or back crotch. So, you don’t add or remove anything at the side. Draw new lines for the crotch and side seam to give it a nice shape.

    This adjustment can be made both on the front and/or the back and may be needed if your posture makes your waistline not horizontal. In the example below, e.g. the total rise is still 70cm (27,5”) for a size 38, but the length of the front rise is longer than the back. Then you can increase the front crotch with 1-2cm (3/8-3/4”) and decrease the back crotch the same length. The side seam is still unchanged. This adjustment will also affect the shape of the pocket, so do the same adjustments on the pocket bags. The easiest way is to place the pocket pattern pieces on top of the adjusted front piece to see how much they need to be adjusted.

    This adjustment can also be made if you have a bigger / smaller stomach or bottom. But I will go into that adjustment more carefully in a later post!

    You can buy the Fieldfare Women’s joggers here at my Etsy shop!

  • Mixing sizes – kids

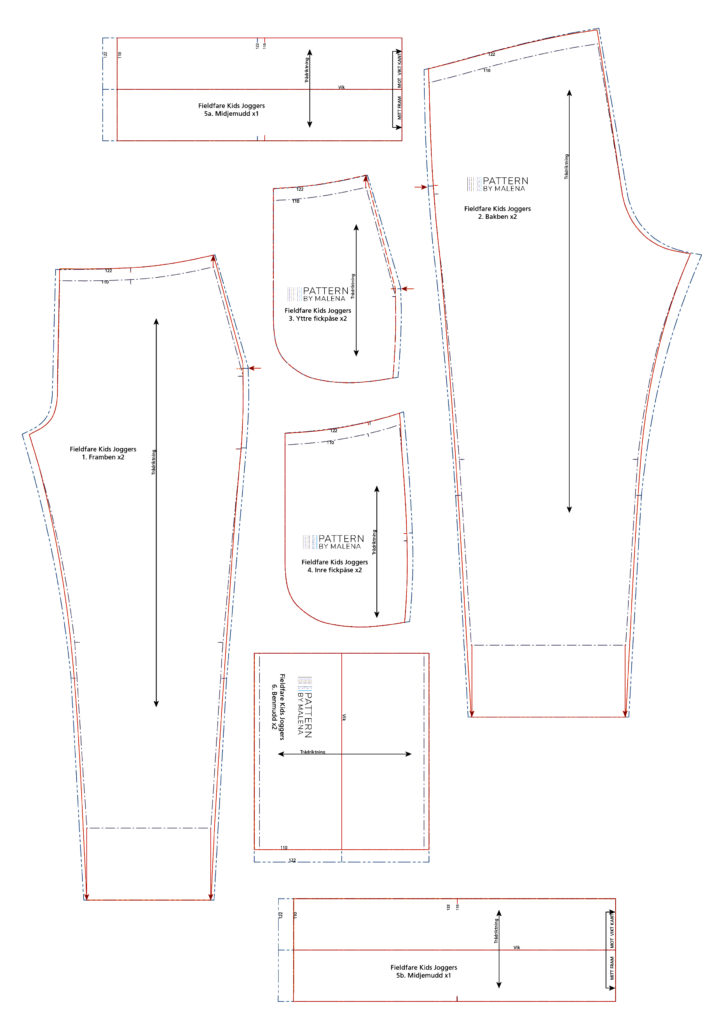
    In a previous post I showed how to mix two sizes for Filedfare baby joggers. The same principle applies to the kids’ joggers, but here you have to take your pocket into consideration as well.

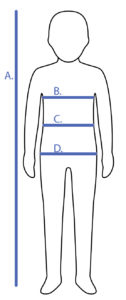
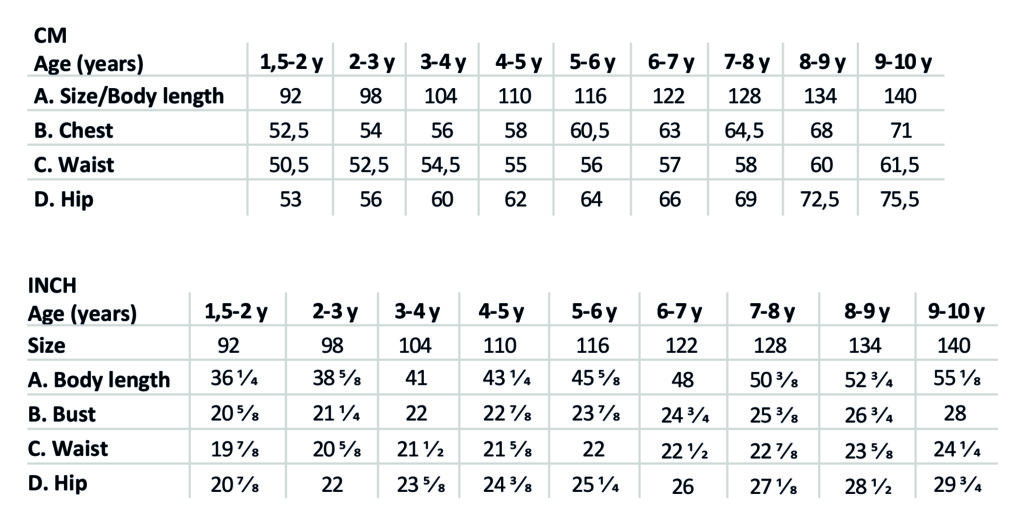
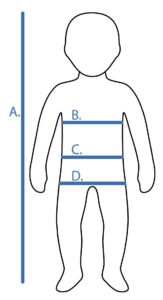
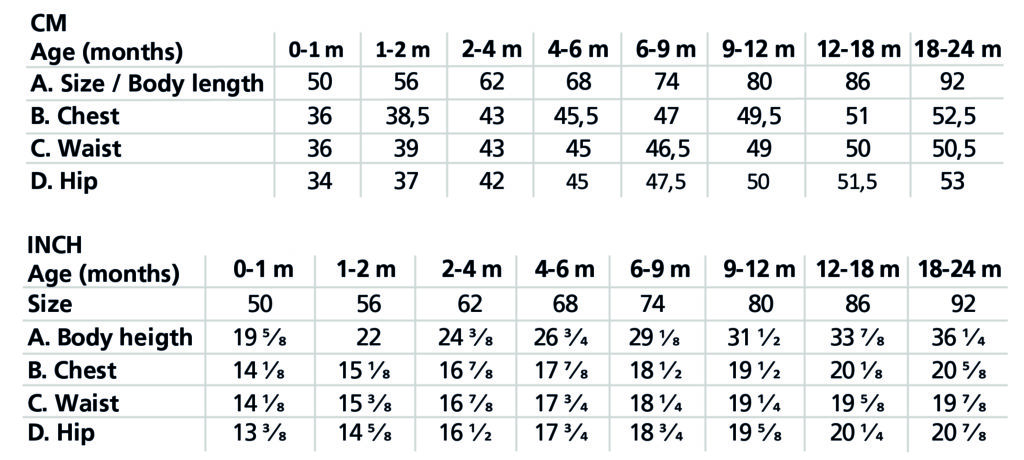
    Start with measuring your kid. For a trouser, the most important measurements are body length, waist and hips.

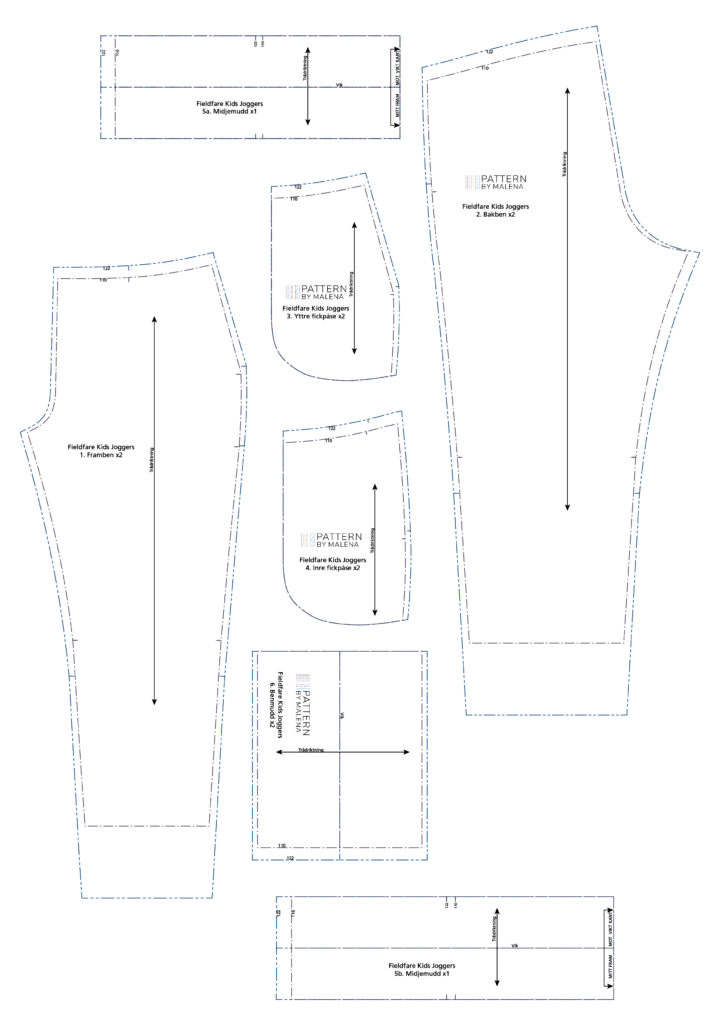
    In this example I will mix the sizes 110 and 122. When you print your PDF pattern you can then choose to print these sizes only. I prefer to make pattern adjustments on the sewing lines and to add the seam allowance afterwards.

    Size 110 and 122 before any adjustments

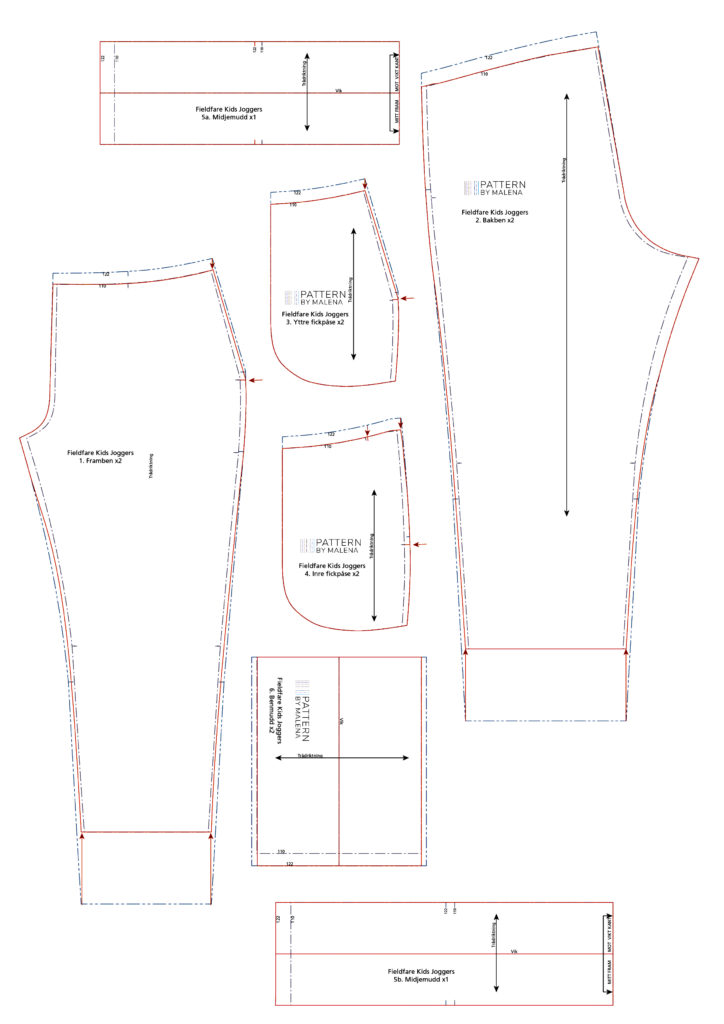
    In the first example below, the kid is closer to 110cm long, but the waist and hips are closer to size 122. I will then follow the length lines for size 110 and the width lines for size 122.

    The waist cuff is not affected as it is not graded in height. Therefore, follow size 122 straight off. On the leg cuff you follow size 110 for the height and on the width you follow size 122. It’s easier if you draw with a different coloured pen so the new lines are easier to distinguish, I have chosen a red colour.

    On the leg patterns you do the same, follow the length-lines for size 110 and the width-lines for size 122. But, here you want to keep the waist and lower leg width as it is on size 122. On the leg you want to keep the size 122 width and move it upwards and then make a new inner and outer side line that softly goes over to size 122. The same goes for the waist, you have to keep the length for the waist. Remember that this needs to be done on the pockets as well. For the pocket notches, follow same height placement as size 110.

    Mixing width size 122 and height size 110

    The same principle applies if your child is size 122 in length and size 110 in width. And the same thing here, you want to keep the waist on the leg pattern and the leg opening width and move up / down them. Remember to make the same change on all parts, including the pocket bags and notches on all pattern pieces.

    Mixing width size 110 and height size 122

    I hope this info helped, good luck with your pattern adjustments!

    If you want to buy this Fieldfare joggers pattern for kids, you can find it here at my Etsy Shop!

  • Mixing sizes – baby

    Choosing the right size can sometimes be tricky. It is rare that you are the same size on all measurements and what size should you follow then? The great thing about sewing your own clothes is that you have the opportunity to adjust the pattern to your body (or to the one you sew). I’ll start by showing how to mix baby sizes.

    Start with measuring your baby. For a trouser, the most important measurements are body length, waist and hips.

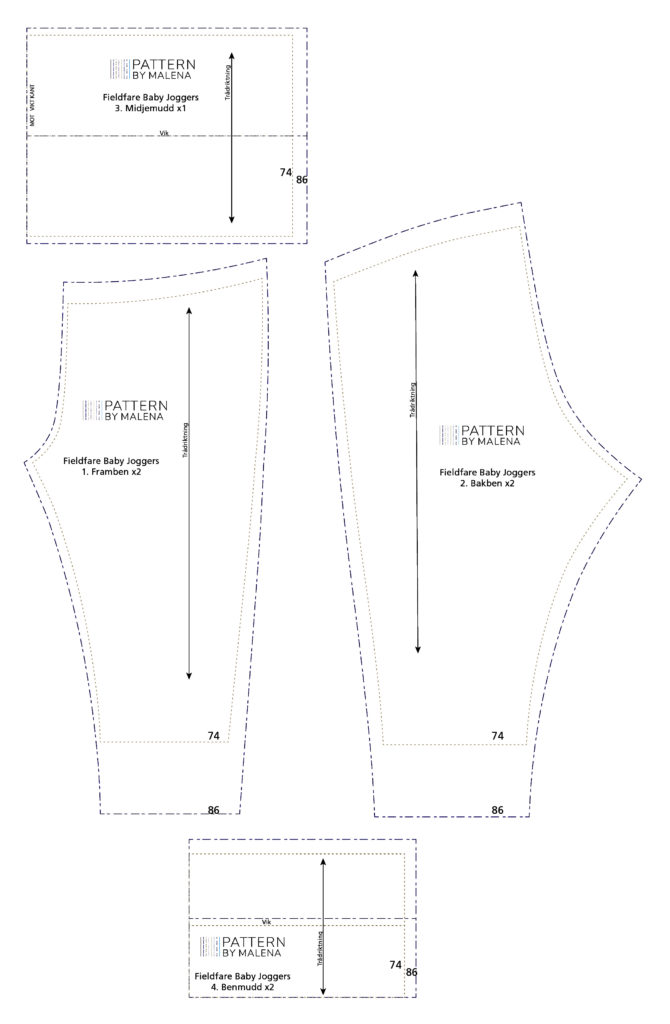
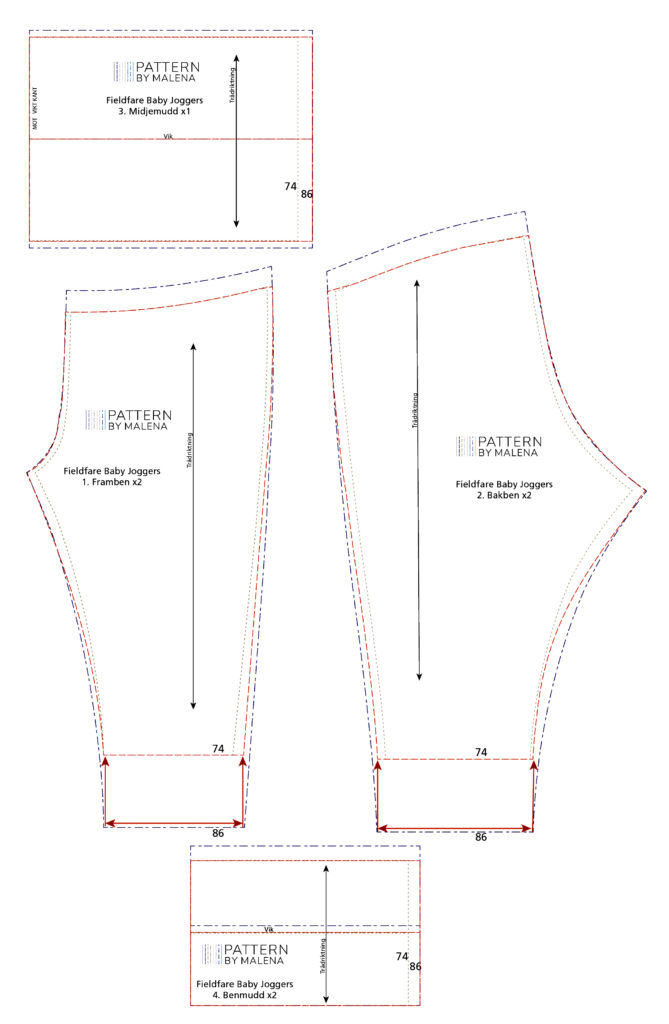
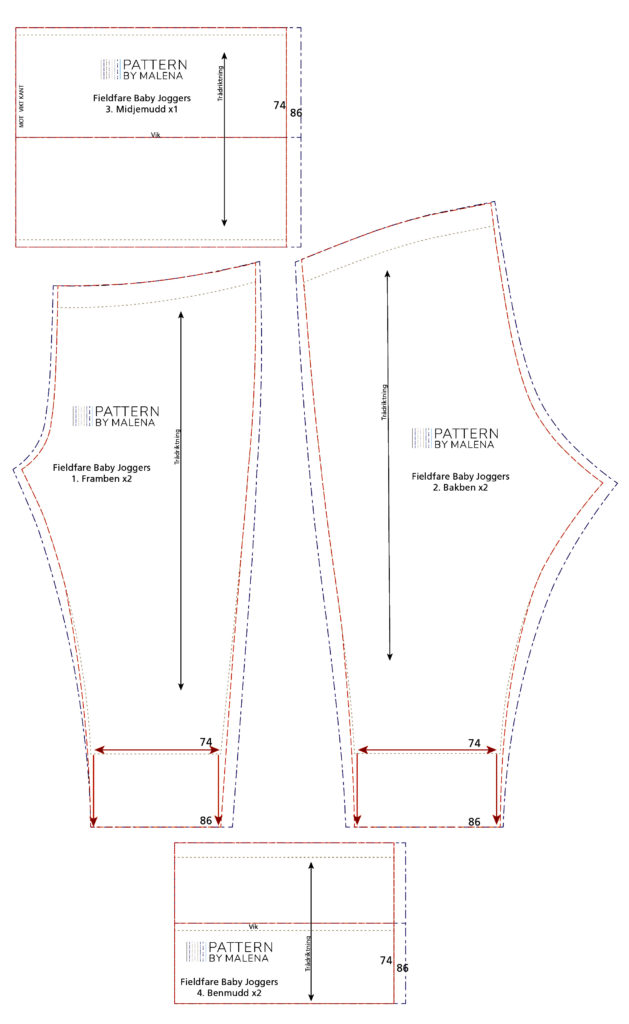
    In this example I will mix the sizes 74 and 86. When you print your PDF pattern you can then choose to print these sizes only. I prefer to make pattern adjustments on the sewing lines and to add the seam allowance afterwards.

    Sizes 74 and 86 without any adjustments.

    In the first example below, the baby is closer to 74cm long, but the waist and hips are closer to size 86. I will then follow the length lines for size 74 and the width lines for size 86.

    It is easier to mix sizes on the waist cuff and leg cuff, so start with them. Follow size 74 for the height lines and size 86 for the width lines. It’s easier if you draw with a different coloured pen so the new lines are easier to distinguish, I have chosen a red colour.

    Tip: Since the waist cuff will be sewn in a rib, it is good to check the stretch of the fabric and especially how good the recovery is. If it is a fabric with a bad recovery that grows a lot, the waist will be too big after a while. Yes, I made this mistake myself. My daughter was dropping her pants after half a day and I had to temporarily solve it by tucking in the top edge inside the diaper… When I saw how much the fabric was growing, I tried to pinch the extra width when she was wearing the pants. I then removed the cuff, cut of and sewed the extra width I had nipped away, and sewed the new cuff back on. After that, she could wear her pants all day! If you have a fabric that seems to grow, you can pull it out a bit before cutting out the pattern, just like pre-washing the fabric, you “pre-stretch” it. Then the fabric cannot grow as much in use. Another suggestion is to remove some extra cm in width.

    But back to the pattern adjustment. On the legs you want to do the same, follow the length-lines for size 74 and the width-lines for size 86. But here you want to keep the waist and lower leg width. For the leg you want to keep the size 86 width and just move it upwards and then make a new inner and outer sideline that softly goes over to size 86. Same goes for the waist.

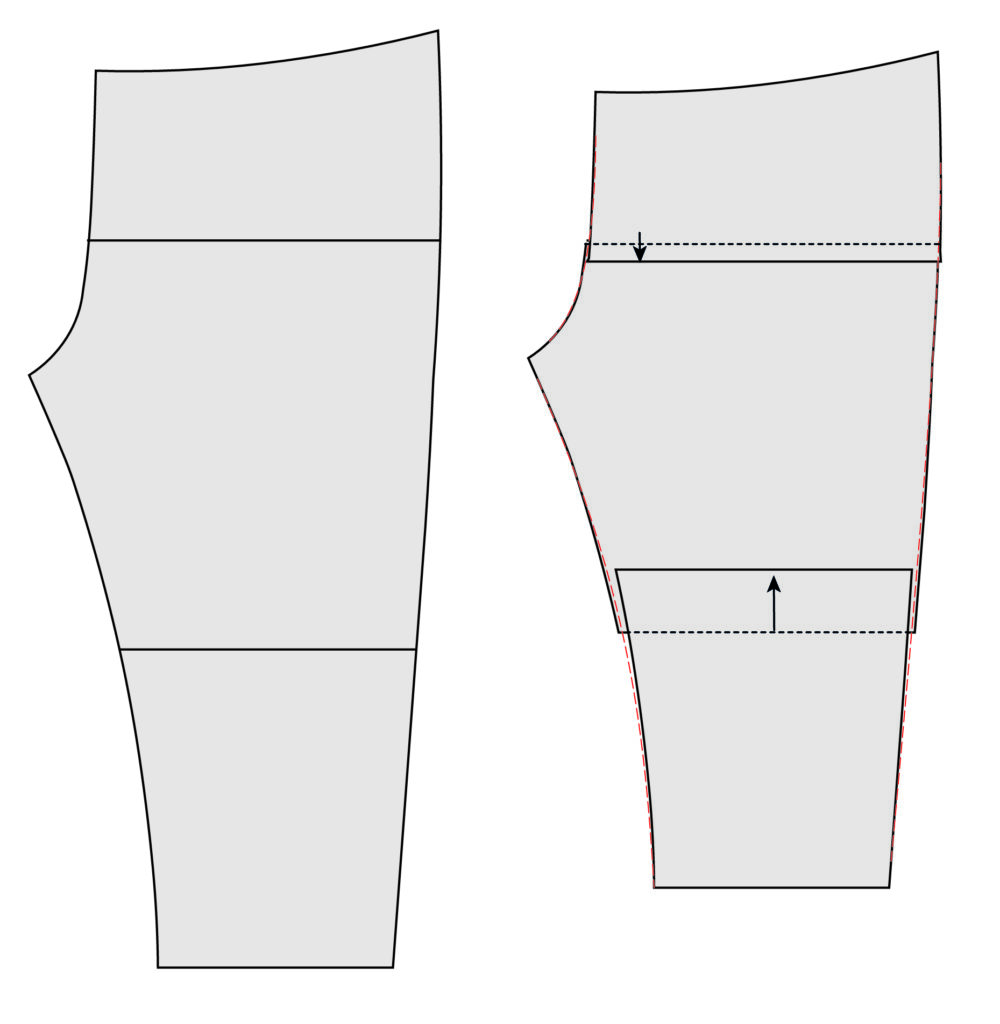
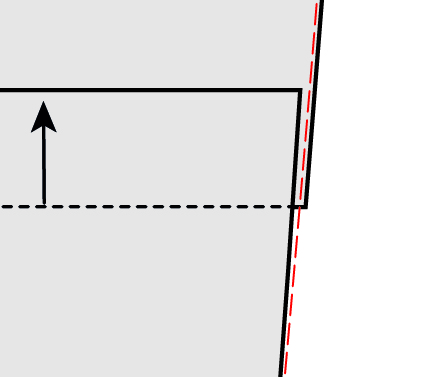
    Below is another way to shorten the length, but with the same result. I have used size 86 and shortened the front rise length and leg length by cutting and overlapping the pattern pieces. How do you know where to draw the horizontal line and cut the pattern? It’s actually not that important! Rarely do I say that when it comes to pattern drafting … Mark out the line about half the height of the leg and half the height of the front rise.

    Draw a new line for the sides, place it in between the old lines.

    The same principle applies if your baby is size 86 in length and size 74 in width. And the same here, you want to keep the width of the waist and the leg and move them up / down.

    Feel free to give feedback on these pattern adjustments! I am curious to hear what you think and if there is anything that can be made !

    Good luck with your pattern adjustments.

    If you want to buy this Fieldfare Joggers for babies, you can fint it here at my Etsy shop.

  • Me Made May 2020

    Soon it’s May and Me Made May! Will you participate in this challange this year and if so, what is your pledge?

    I will attend for the second year, but in a slightly different way. Last year was my first year and my goal was to sew more. It went disastrously bad. Think I managed to sew one garment …

    This year I will attend, but not with pictures of clothes that I made. At the moment, I live in my Fieldfare joggers, and posting a picture of them every day will be a little monotonous … My pledge for this year is to show how you can customize your pattern for your body! Or for your child’s or baby’s body. I aim to do a pattern hacks three times a week! I will start writing about how you can use and adjust my Fieldfare joggers pattern (which you will find here), then general fit adjustments on pants and then move on to other garments. My goal is to continue with this even after May, because one month is not enough to cover everything of course. But it’s a start and I hope you want to follow this!

    Picture from the blog So, Zo what do you know

    Do you wanna know what the Me Made May challange is? You can read more about it at the blog So, Zo what do you know!

  • How I make my PDF-patterns

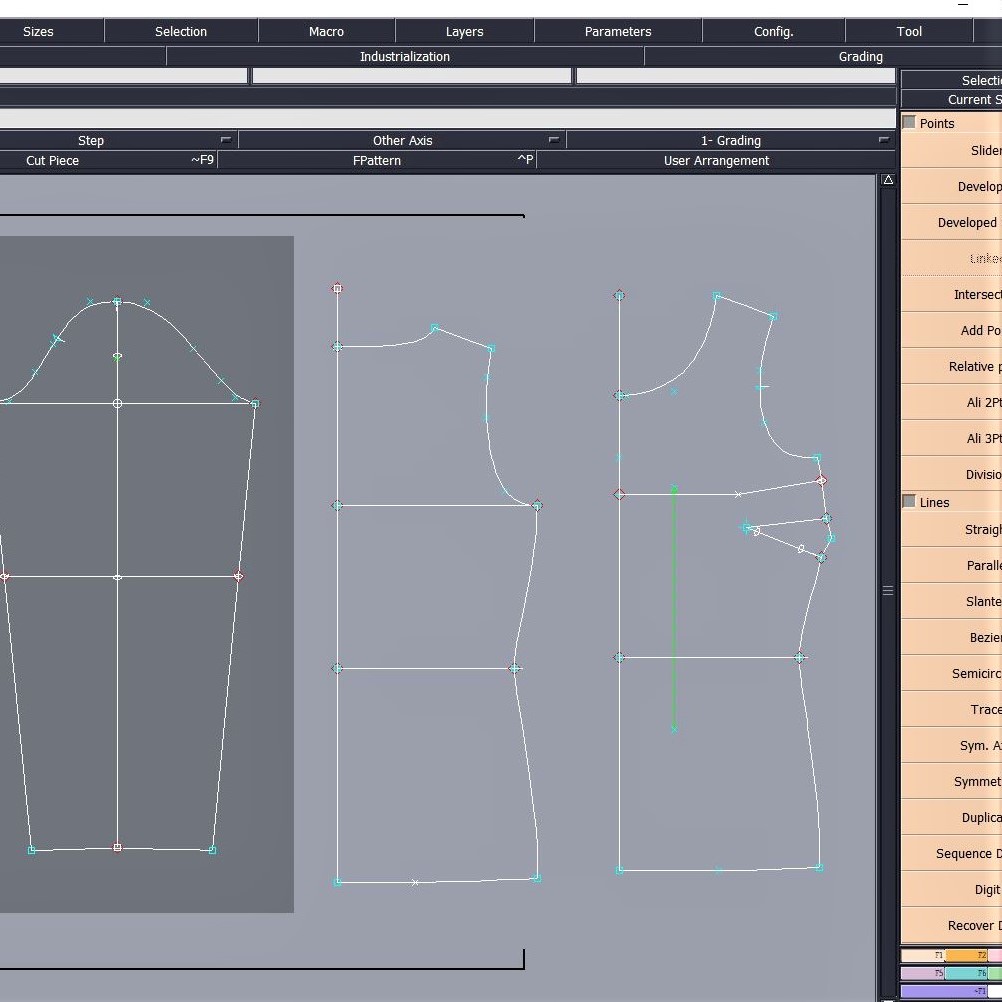
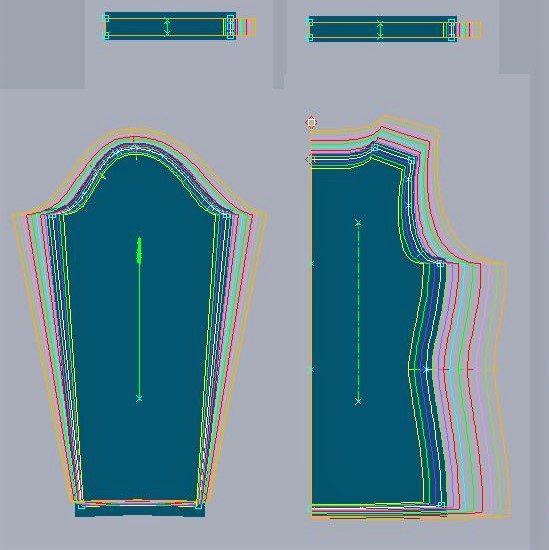
    I’ve got some questions about how I make my patterns and what programs I work in. That’s why I want to show my work process with some pictures!

    I work in a pattern program called Modaris Lectra. It is specifically made to make clothing patterns (and other patterns for textile products, I think, such as car seats etc). It has functions that are great for clothing patterns, you can for example put the different pattern pieces toghether and see that the transitions between lines look smooth, like armholes and that the side seams have the same length. You can also measure lines and save these measurements in a measurement list. Should I make an adjustment at the waist, I can go into the measure list and see the updated waist measurment.

    It sounds pretty magical, but, it is still me who has to put out every point and line, and that will decide for how the fit will turns out. The program does not make a “good” fit automatically, it is still just a drawing tool …

    When I am satisfied with the fit in the base size, I add the grading. Again, the program does not make it magically bu itself. I need to manually enter X and Y coordinates for how each point should grow. Of course, there are functions that allow me to copy the values of a point to another or shift the values etc. But I still have to decide how all points and lines should grow. And make sure that all distances grow equally, that the armhole front and back grow as much as the sleeve head does.

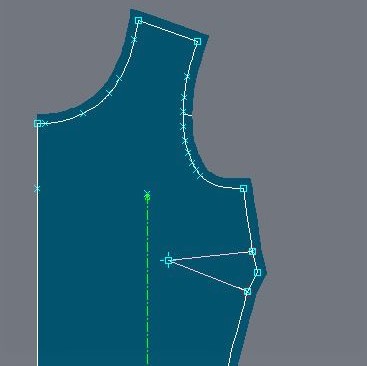
    After the “skeleton” is finished, I take out the real pattern pieces and add the seam allowances and hems.

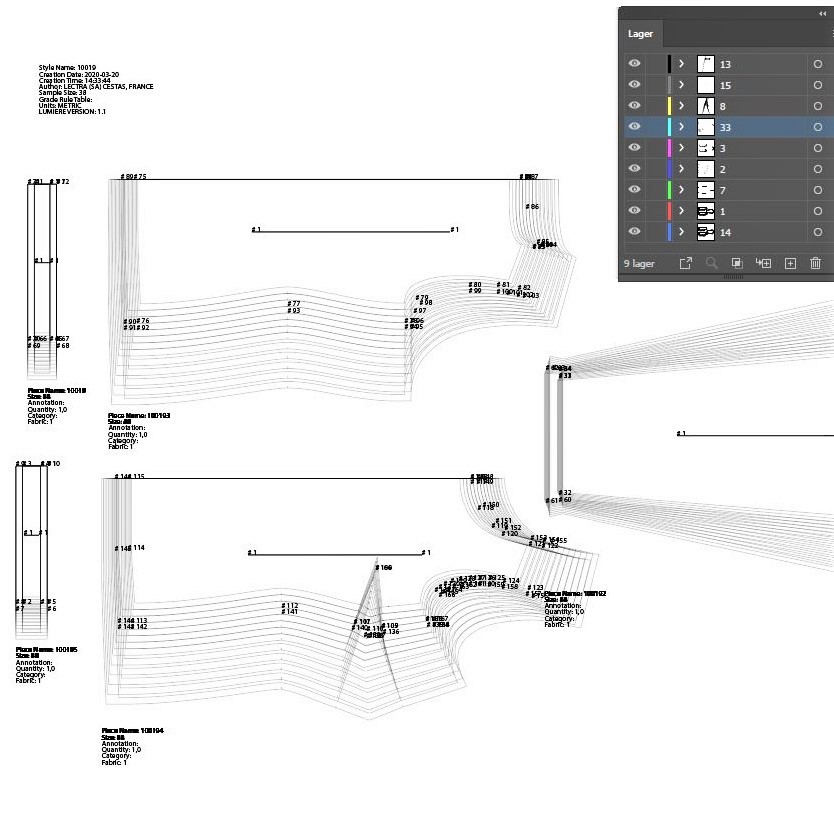
    When all pattern pieces are done, I export them to a DXF file, a kind of conversion file. I can then open this file in Illustrator.

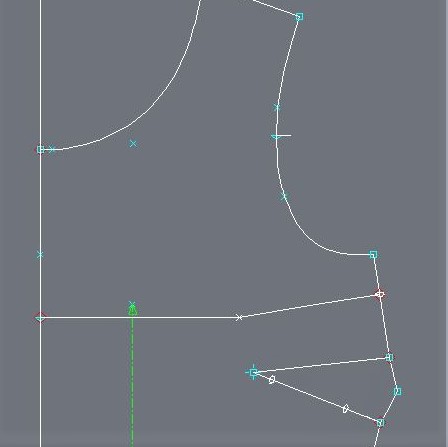
    There is still quite a lot work to be done in Illustrator! Both the sewing lines and the seam allowance lines look the same, but luckily they are in different layers. Otherwise it would’ve been completely impossible to distinguish them …

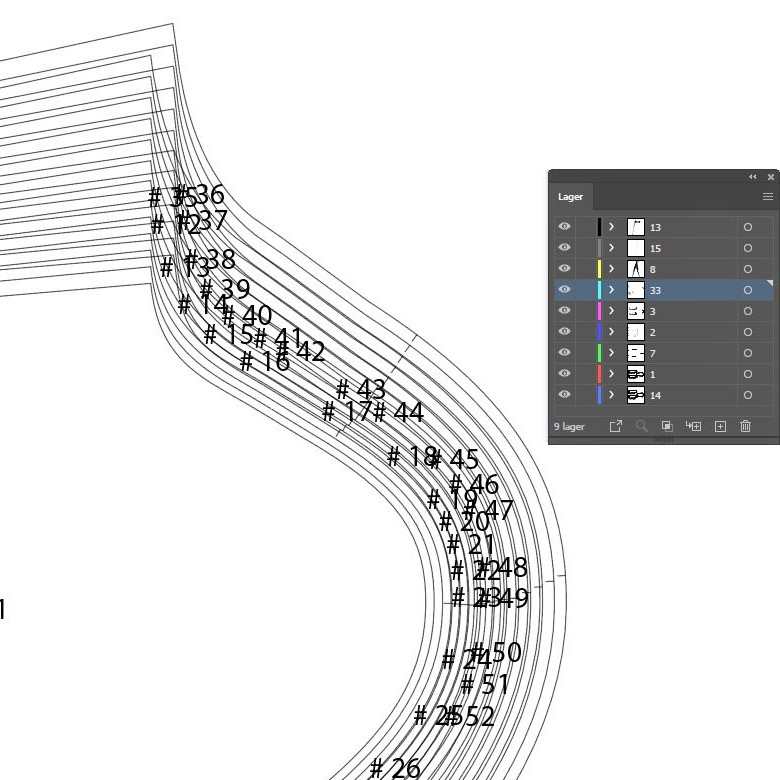
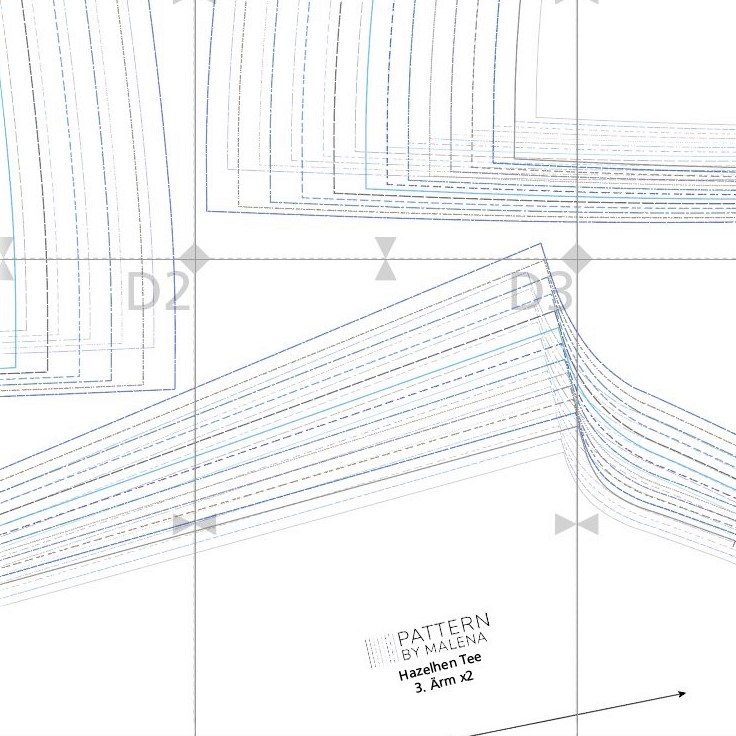
    Close up of sleeve head. Lots of numbers and studd to be deleted …. Each line will then be put in its own layer, ie the right size and whether it is a sewing line or seam allowance line. All sizes have different colors and looks on the line to make them easier to distinguish. The seam allowance has a slightly stronger line and the sewing line is a little weaker to avoid mixing them together.

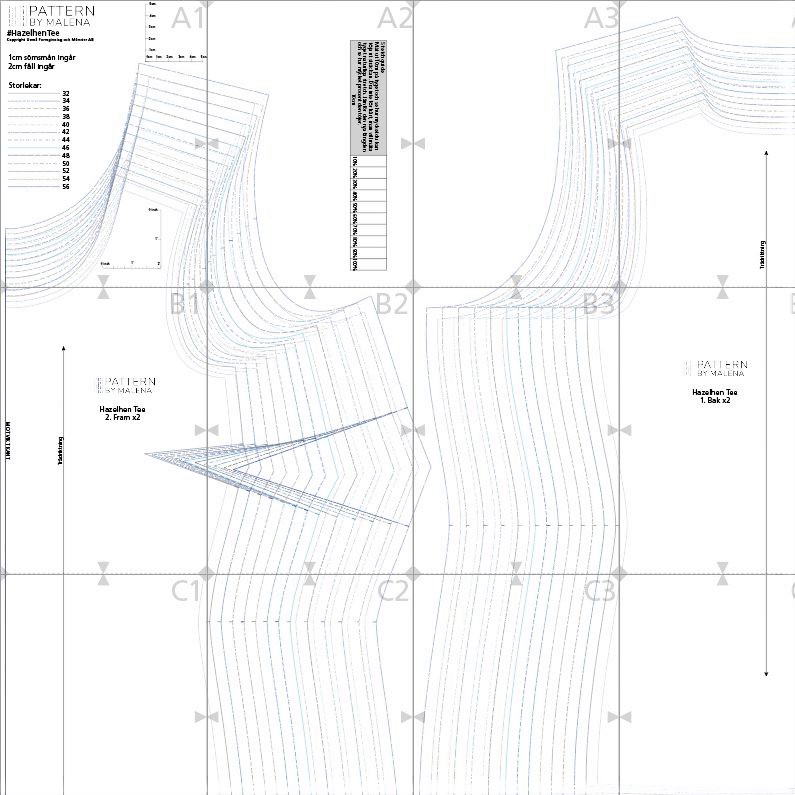
    When all lines and notches have been placed in the right layer and got the right color, I put them on my “paper template”. I have built up a grid of sheets of paper and each paper is then saved to a separate page in the PDF. I do not know hooow many times I have moved around a pattern piece and continued working and then realized that all the sewing lines were “closed down”, which means the lines were not moved….

    Having both sewing and seam allownace lines is quite a lot extra work, but I really want to have them both. If you make fit adjustments, it is much better to do them on the sewing lines, you have better control then. It is also the length of the sewing lines that should be matched (or have ease), not the edge of the seam allowance. But, I definitely understand the convenience of having the seam allowance added, that’s where you cut. So I wasn’t willing to compromise and remove any of the lines!

    But, if you open the PDF in a program that does not have the layer function and all layers are visible, then it will be difficult to distinguish all these lines. You see what it looks like in the picture… That’s why I have also made a PDF file that only contains seam allowance lines.

    These pictures are fromt my new pattern I’m working on, Hazelhen Tee. It’s a classic t-shirt for women, kids and babies. The women’s pattern will have two fit options, one option without bust dart and one with a bust dart. I have already done a “full bust adjustment” so it will have a better fit if you have a fuller bust measurement. The patterns are done, the sewing tutaliran are under construction and then the testing phase will begin! It will be so exciting to see the testing result!!

  • What’s next on my to-do list

    Monday and back to work again! I’m fortunate and think it is quite nice to start a new work week. You get to gather my thoughts (house projects and a energetic 2-year-old tend to make the thoughts quite scattered…) and write the week’s plan and decide(-ish) on what to do when.

    So, I thought I’d share what’s on my to-do list and what a work week can be like for me.

    First thing on Monday morning I write down the week’s plan. It helps me to prioritize and plan. It’s not often that all things are done during one week, but then the tasks are moved over to next week. Some things are practical styff that needs to be done on certain dates, such as paying invoices, VAT, making sure to mail in documentation for accounting etc. Others are a bit more diffuse, like working with social media and marketing. It’s also this that’s unfortunately often postponed to next week (and next and next …) I have several blog posts I want to write, but to take the time is difficult. As a self-employed I have to work with this, social media marketing is the only way for me to reach out with my products. But, I’m a pattern maker, so it doesn’t really feel like I’m working when I’m, for example, writing this blog post. But that is a mind-set that I’m working on…

    Monday is also the day that I do all the must-do things. For the most part, I do customer assignments as it comes, but Monday is usually the day I focus on this. Customer assignments also have the biggest priority for me, so after they are done, I know more about how much time I have to spend on everything else.

    Lately, it has been very quiet with assignments for clients and I have therefore focused on my own patterns. Fieldfare joggers are now launched in both English and Swedish!! It’s so nice to finally be done with them. Next step is marketing and finilize the next product. Fieldfare joggers are a basic pattern and I want to show different “hacks” you can do and how to adjsut the fit to your own body. And I’ve decided one thing. I will not focus on sewing techniques or sewing details. There are so many other sewists who are so much better at this than I am (but I’ll give tips on where to find this info). Instead I’ll focus on what I am good at, which is how to adjust and work with patterns! A couple of weeks ago I asked in a Swedish facebook group for sewists what fit adjustments they wanted to learn and what adjustments they usually need to do. And oh, what a response I got! In other words, you are very interested in learning more about this and it suits me perfectly! So, the next step will be to start posting, both on the blog and Instagram, how to use my patterns and how you can change them. My view is that a pattern is a starting point, but that the person who should make the pattern more personal, both when it comes to design and fit. This feels great to write about and the list of adjustments I want to talk about is long!! I want to do everything at once, but I have to take one thing at a time, one adjustment first and then the next.

    I also have one more pattern I want to launch soon! It’s Hazelhen tee for babies, kids and ladies. I’ve got a first draft of the text, pictures, a template for how the sewing description should look like, the material calculation is almost complete, etc. Now it’s “just” put it all together and work on the layout. I’m not looking forward to this at all, not my favorite job … That’s why I asked if Johanna from The last stich could help me with this instead. I have previously helped her with grading a pattern for a leggings and we have had a great collaboration. She works as a journalist and knows this much better than I do, so I was so happy that she could help me. Best thing is to focus on what you are good at, otherwise it will only take an extra long time and the results will usually not be as good … (My plan when I started my business was to manage the daily accounting myself. That idea I gave up after 10 min with a bookkeeper. I’m very happy with that decision.)

    This is what my week looks like. Do some customer assignments, plan and work with marketing for Fieldfare joggers, plan and prepare for pattern adjustments / “pattern-hacks” and send info for Hazelhen to Johanna. And there are plenty of other things as well. Talk about the financial situation with my bookkeeper since I’ll soon be on parental leave. Take photos to Instagram, a re-accuring point on my list that is always pushed forward. I would like to sew samples, but it has to wait until the office is completely renovated. And some administrative things too, boring but necessary.

    Now I can check of the “make a Monday blog post” and continue on to next thing! Hope you have a great week!

  • I made the newspaper!

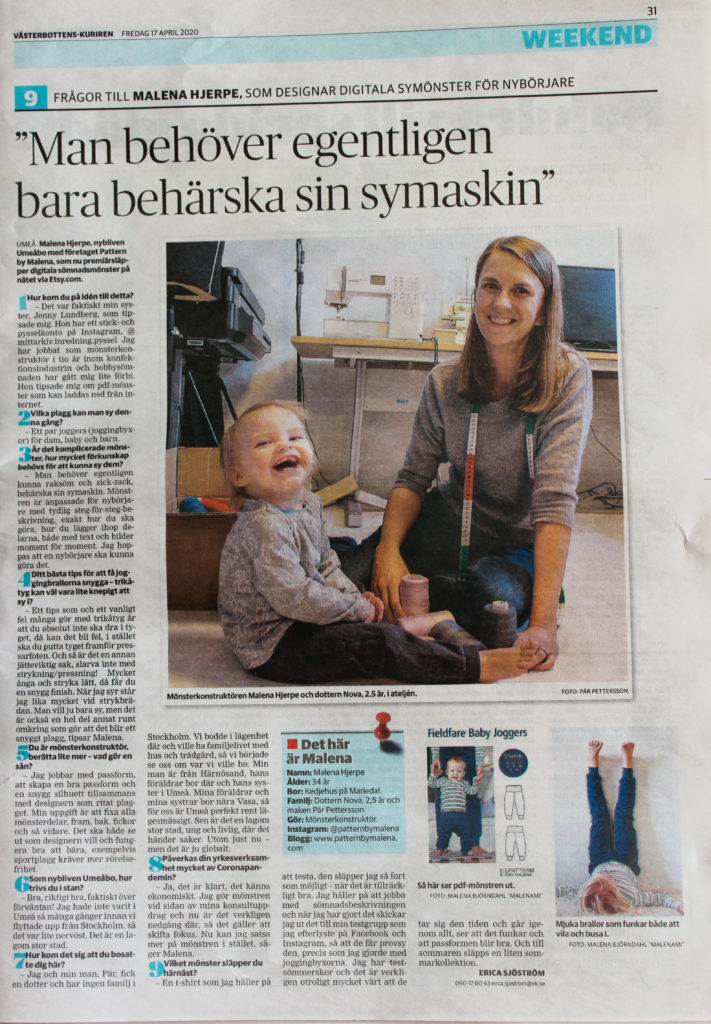
    Yesterday I was in the local newspaper. Västerbotten-Kuriren asked me 9 questions and it ended up as an article in their Weekend paper.

    They asked me about my pattern launch, what it’s like working as a pattern maker and how I like living in my new hometown, Umeå.

    It’s so great to that they want to highlight this and support a local and small company.

    And now you can finally find both the Swedish and English version of my Filedfare joggers at my Etsy shop! I’m so excited and qurious to hear what you think of them!
  • Pattern release!


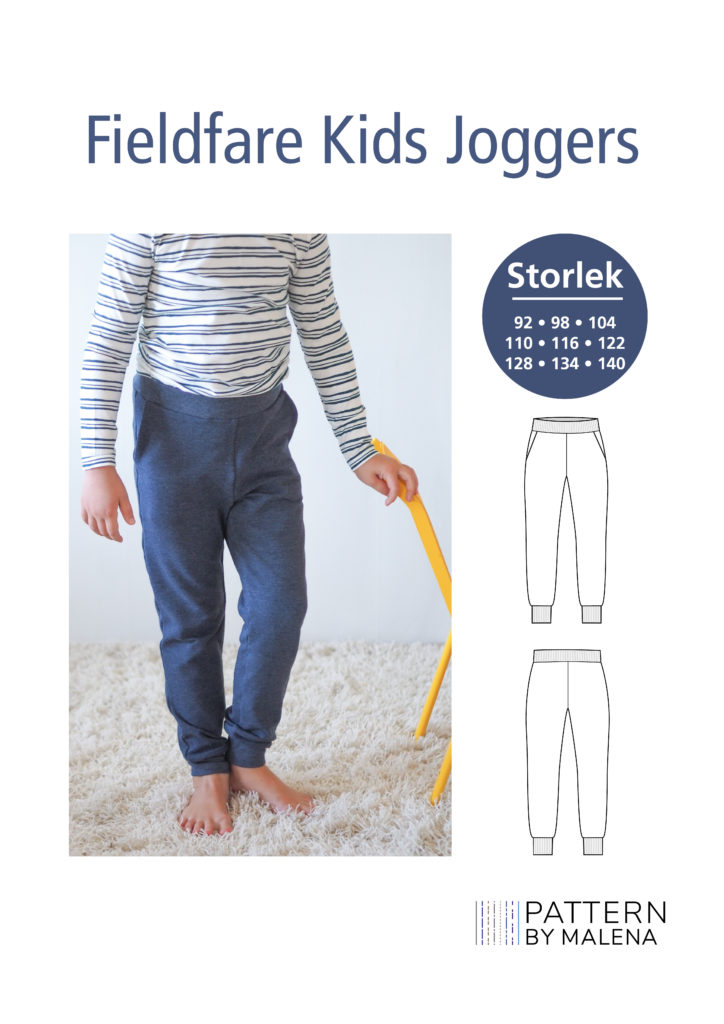
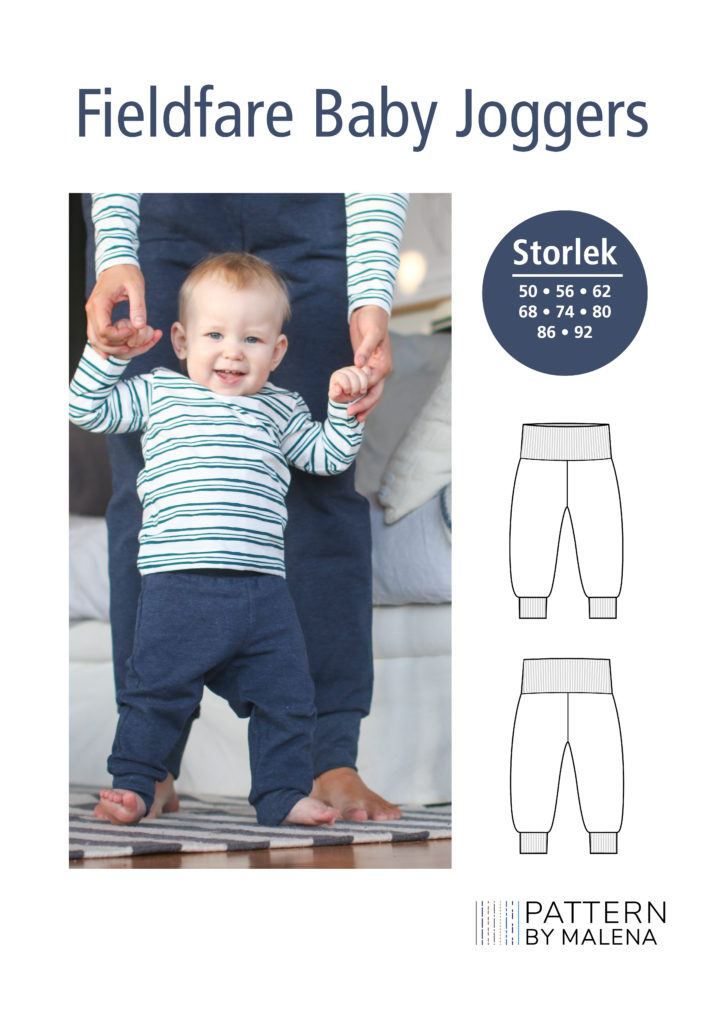
    Hurray, it’s finally time to launch my first pattern! You can now find Fieldfare joggers for woman, kids and baby here at my Etsy shop.

    Fieldfare joggers for woman and kids are a classic joggers model with pockets. The joggers have a waistband cuff with an elastic band inside and a wide leg cuff. There are two alternatives for the waistband, one where the waistband cuff is without gatherings and one with gatherings. They have a wide cuff at the leg opening.

    The baby joggers have an extra wide cuff at the waist so you can fold and unfold it as the baby grows. They have a wide cuff at the leg opening and there are extra room for a diaper.

    The fit is relaxed and comfortable for all three models. My focus has been to create comfortable garments that are easy to move in. This is a perfect base pattern that you easily can adjuste and update to make it your own. I will later on show some pattern hacks that you easily can do at home!

    Sizes:
    Woman: EUR 32-56
    Kids: 92-140
    Baby: 50-92

    Material recommendations:
    Medium weight knit (like sweatshirt) with minimum 30% stretch in it and a rib for the waist and leg cuff.

    PDF-pattern
    The pattern is created so all sizes are in different layers and different colored lines. Both A4/Letter and A0 (A1 for baby) are made in two versions. In one version you can see only the seam allowance lines and in the other version you can find both the seam lines and the seam allowance lines. The seam allowance is 1cm (3/8inch

    Photo: MalenaMi

    I hope you like these patterns and I will soon release the English versions as well (at the moment they are only in Swedish). The t-shirt you can see on the photos are Hazelhen Tee that also will be released soon!