I’ve got some questions about how I make my patterns and what programs I work in. That’s why I want to show my work process with some pictures!

I work in a pattern program called Modaris Lectra. It is specifically made to make clothing patterns (and other patterns for textile products, I think, such as car seats etc). It has functions that are great for clothing patterns, you can for example put the different pattern pieces toghether and see that the transitions between lines look smooth, like armholes and that the side seams have the same length. You can also measure lines and save these measurements in a measurement list. Should I make an adjustment at the waist, I can go into the measure list and see the updated waist measurment.
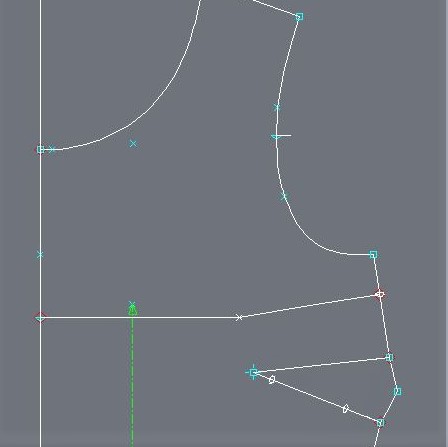
It sounds pretty magical, but, it is still me who has to put out every point and line, and that will decide for how the fit will turns out. The program does not make a “good” fit automatically, it is still just a drawing tool …

When I am satisfied with the fit in the base size, I add the grading. Again, the program does not make it magically bu itself. I need to manually enter X and Y coordinates for how each point should grow. Of course, there are functions that allow me to copy the values of a point to another or shift the values etc. But I still have to decide how all points and lines should grow. And make sure that all distances grow equally, that the armhole front and back grow as much as the sleeve head does.
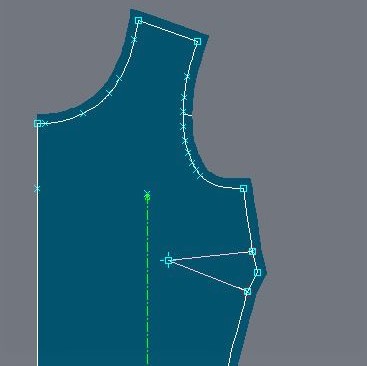
After the “skeleton” is finished, I take out the real pattern pieces and add the seam allowances and hems.
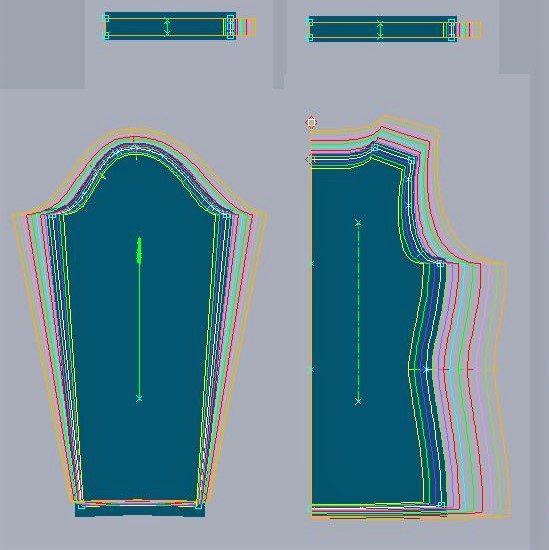
When all pattern pieces are done, I export them to a DXF file, a kind of conversion file. I can then open this file in Illustrator.

There is still quite a lot work to be done in Illustrator! Both the sewing lines and the seam allowance lines look the same, but luckily they are in different layers. Otherwise it would’ve been completely impossible to distinguish them …
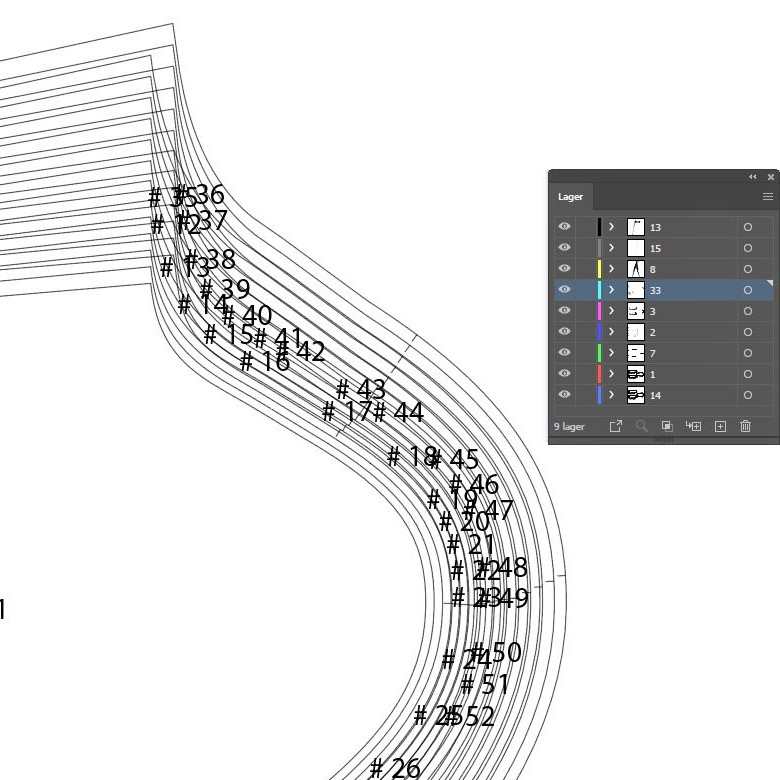
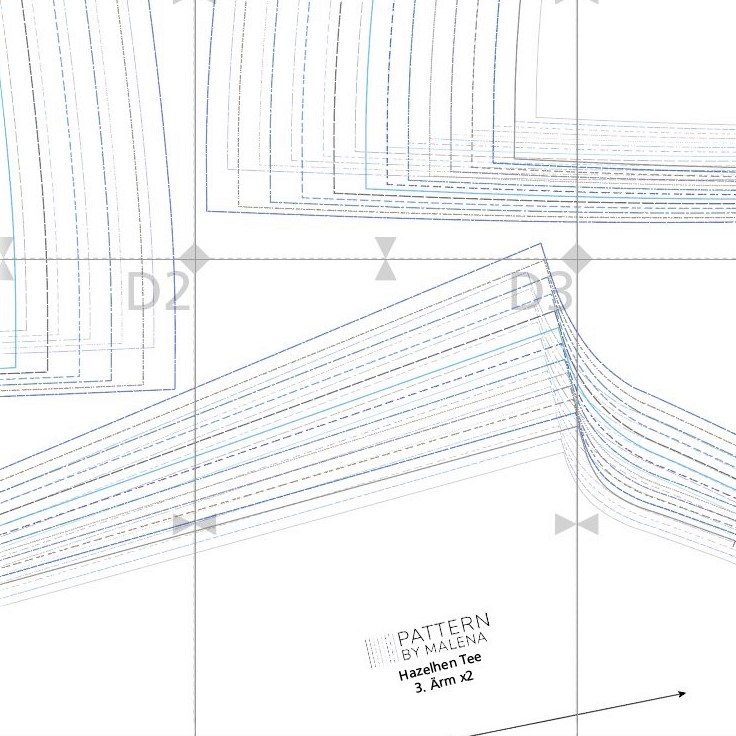
Close up of sleeve head. Lots of numbers and studd to be deleted …. Each line will then be put in its own layer, ie the right size and whether it is a sewing line or seam allowance line. All sizes have different colors and looks on the line to make them easier to distinguish. The seam allowance has a slightly stronger line and the sewing line is a little weaker to avoid mixing them together.
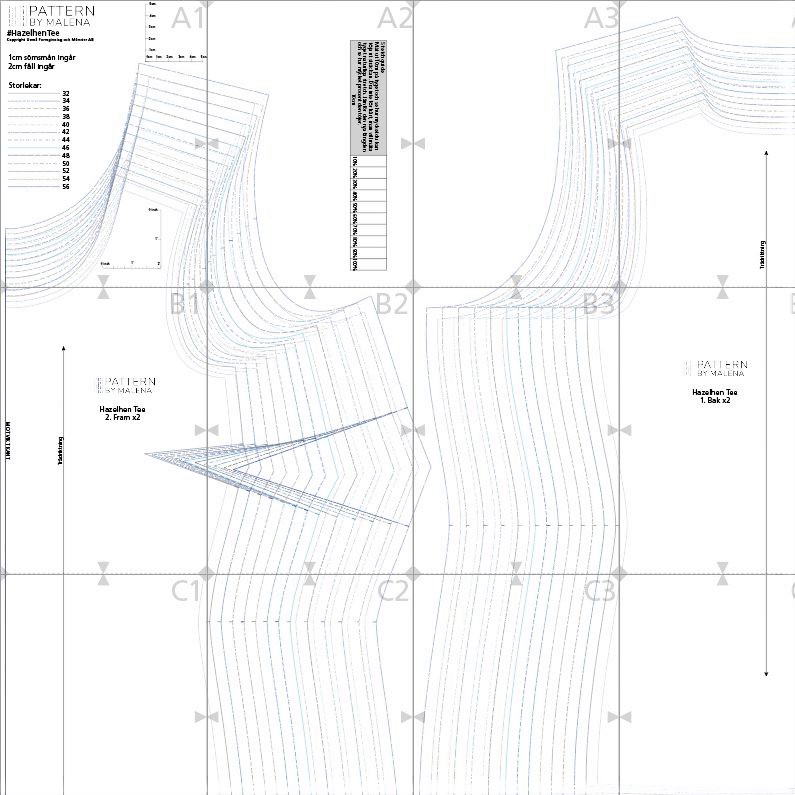
When all lines and notches have been placed in the right layer and got the right color, I put them on my “paper template”. I have built up a grid of sheets of paper and each paper is then saved to a separate page in the PDF. I do not know hooow many times I have moved around a pattern piece and continued working and then realized that all the sewing lines were “closed down”, which means the lines were not moved….
Having both sewing and seam allownace lines is quite a lot extra work, but I really want to have them both. If you make fit adjustments, it is much better to do them on the sewing lines, you have better control then. It is also the length of the sewing lines that should be matched (or have ease), not the edge of the seam allowance. But, I definitely understand the convenience of having the seam allowance added, that’s where you cut. So I wasn’t willing to compromise and remove any of the lines!
But, if you open the PDF in a program that does not have the layer function and all layers are visible, then it will be difficult to distinguish all these lines. You see what it looks like in the picture… That’s why I have also made a PDF file that only contains seam allowance lines.
These pictures are fromt my new pattern I’m working on, Hazelhen Tee. It’s a classic t-shirt for women, kids and babies. The women’s pattern will have two fit options, one option without bust dart and one with a bust dart. I have already done a “full bust adjustment” so it will have a better fit if you have a fuller bust measurement. The patterns are done, the sewing tutaliran are under construction and then the testing phase will begin! It will be so exciting to see the testing result!!