Choosing the right size can sometimes be tricky. It is rare that you are the same size on all measurements and what size should you follow then? The great thing about sewing your own clothes is that you have the opportunity to adjust the pattern to your body (or to the one you sew). I’ll start by showing how to mix baby sizes.
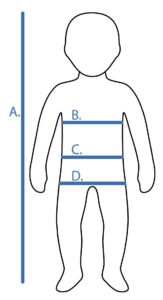
Start with measuring your baby. For a trouser, the most important measurements are body length, waist and hips.

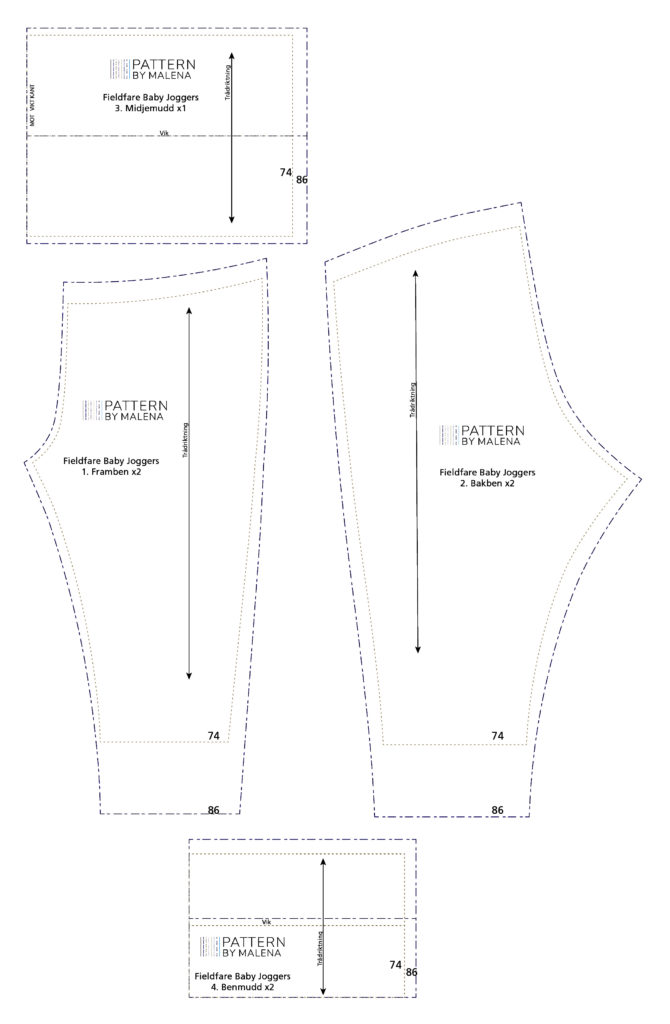
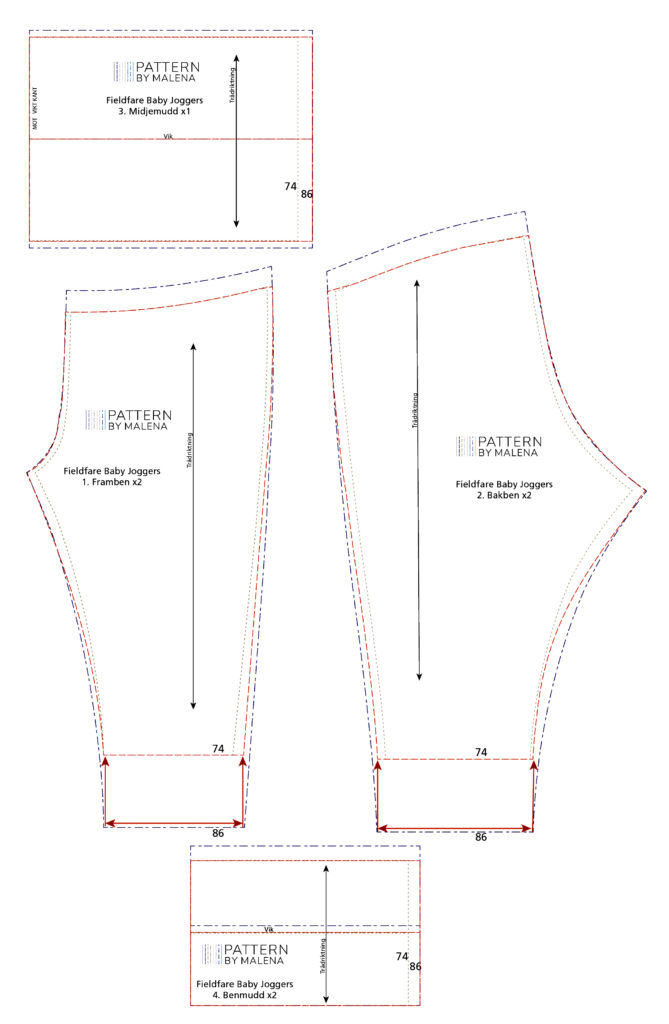
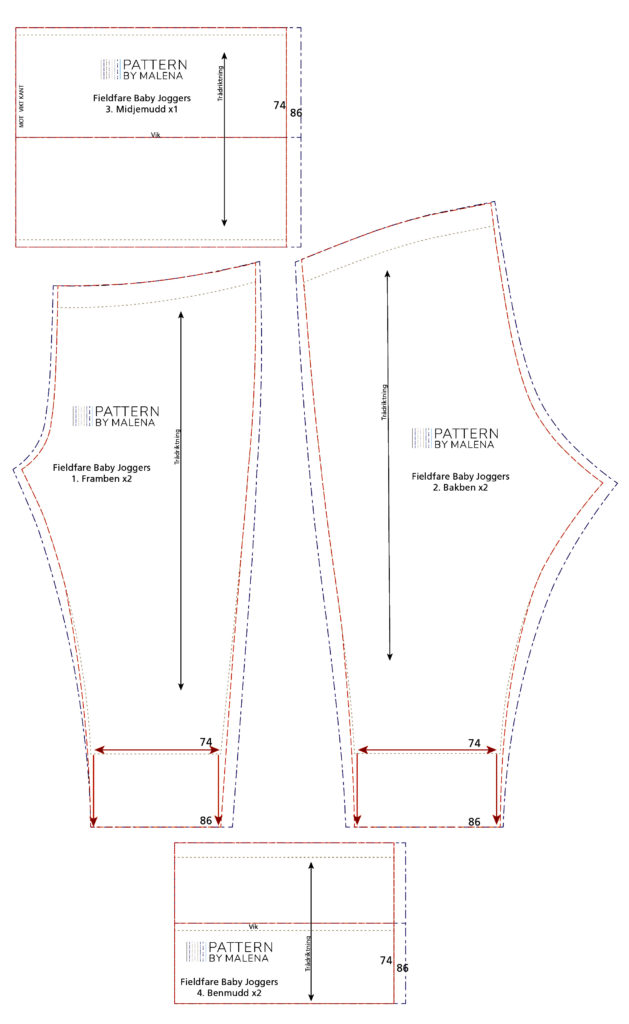
In this example I will mix the sizes 74 and 86. When you print your PDF pattern you can then choose to print these sizes only. I prefer to make pattern adjustments on the sewing lines and to add the seam allowance afterwards.
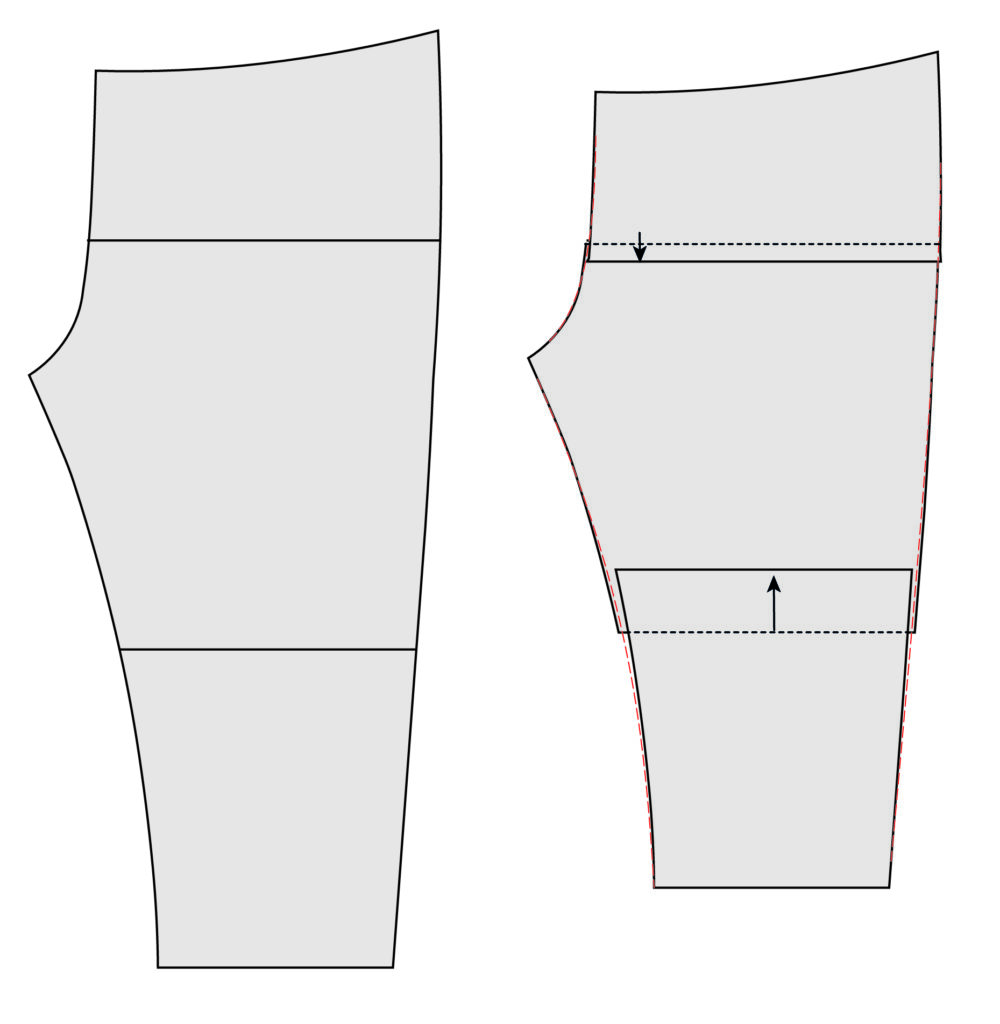
In the first example below, the baby is closer to 74cm long, but the waist and hips are closer to size 86. I will then follow the length lines for size 74 and the width lines for size 86.
It is easier to mix sizes on the waist cuff and leg cuff, so start with them. Follow size 74 for the height lines and size 86 for the width lines. It’s easier if you draw with a different coloured pen so the new lines are easier to distinguish, I have chosen a red colour.
Tip: Since the waist cuff will be sewn in a rib, it is good to check the stretch of the fabric and especially how good the recovery is. If it is a fabric with a bad recovery that grows a lot, the waist will be too big after a while. Yes, I made this mistake myself. My daughter was dropping her pants after half a day and I had to temporarily solve it by tucking in the top edge inside the diaper… When I saw how much the fabric was growing, I tried to pinch the extra width when she was wearing the pants. I then removed the cuff, cut of and sewed the extra width I had nipped away, and sewed the new cuff back on. After that, she could wear her pants all day! If you have a fabric that seems to grow, you can pull it out a bit before cutting out the pattern, just like pre-washing the fabric, you “pre-stretch” it. Then the fabric cannot grow as much in use. Another suggestion is to remove some extra cm in width.
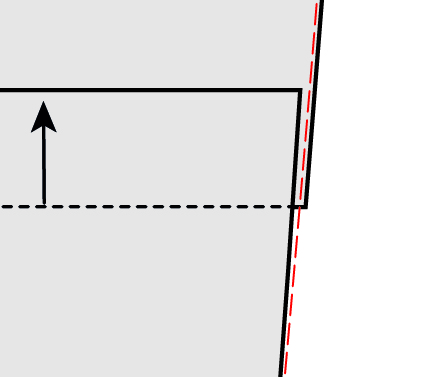
But back to the pattern adjustment. On the legs you want to do the same, follow the length-lines for size 74 and the width-lines for size 86. But here you want to keep the waist and lower leg width. For the leg you want to keep the size 86 width and just move it upwards and then make a new inner and outer sideline that softly goes over to size 86. Same goes for the waist.
Below is another way to shorten the length, but with the same result. I have used size 86 and shortened the front rise length and leg length by cutting and overlapping the pattern pieces. How do you know where to draw the horizontal line and cut the pattern? It’s actually not that important! Rarely do I say that when it comes to pattern drafting … Mark out the line about half the height of the leg and half the height of the front rise.
Draw a new line for the sides, place it in between the old lines.
The same principle applies if your baby is size 86 in length and size 74 in width. And the same here, you want to keep the width of the waist and the leg and move them up / down.
Feel free to give feedback on these pattern adjustments! I am curious to hear what you think and if there is anything that can be made !
Good luck with your pattern adjustments.
If you want to buy this Fieldfare Joggers for babies, you can fint it here at my Etsy shop.